


Who is this guide for? This guide will walk employees without a Health Connector account through setting up their employee account, selecting a plan, or waiving coverage.
Get Started – Setup Your Account
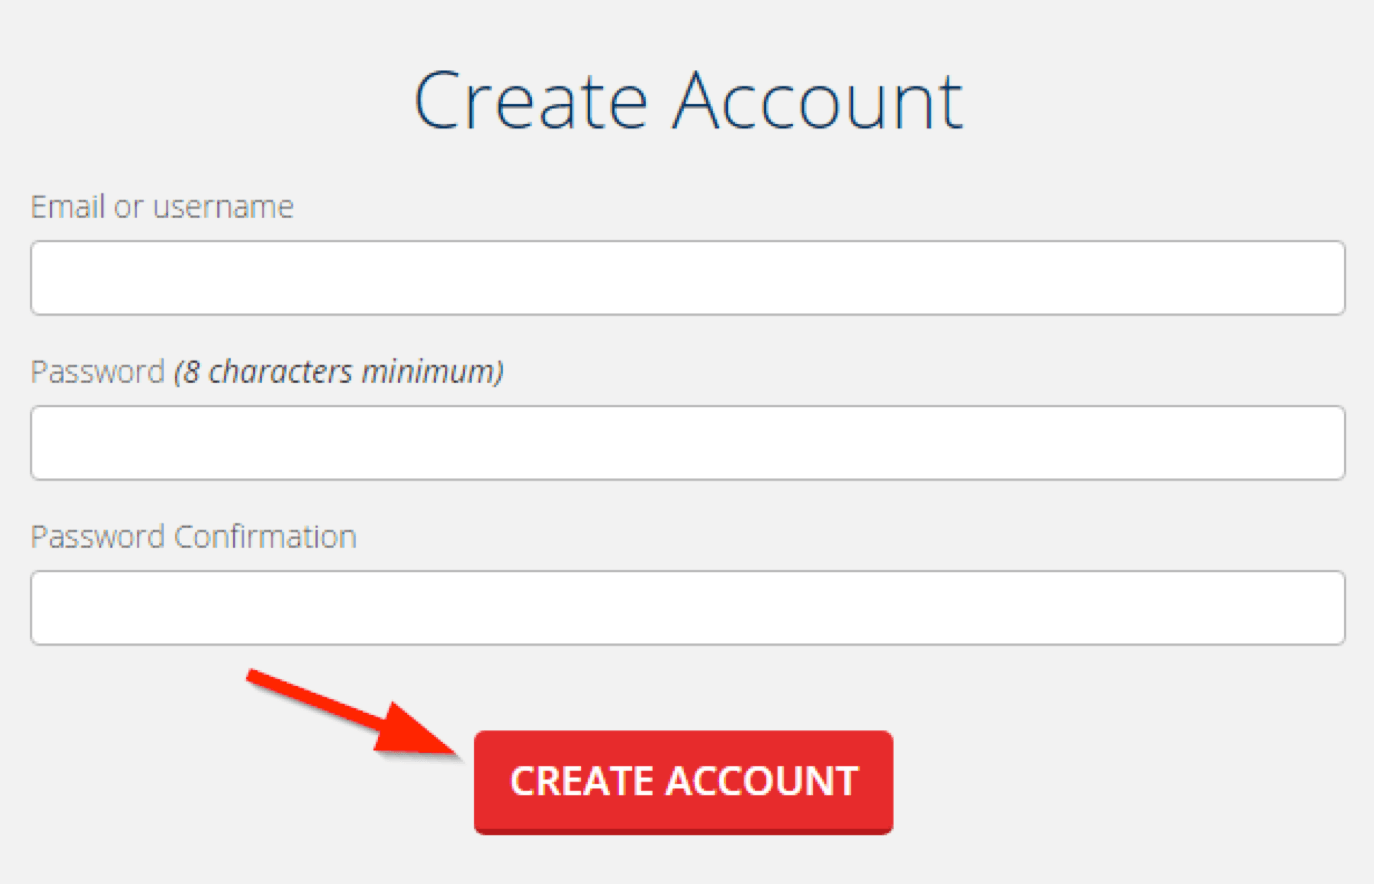
Go to the Create Employee Account page fill out your email address and create a password (8 character minimum) and click the “Create account” button. Please be sure to record your password somewhere secure. You’ll use your email address as your login in the future.
Your Information and Matching to your Employer
Your Information – Step 1:
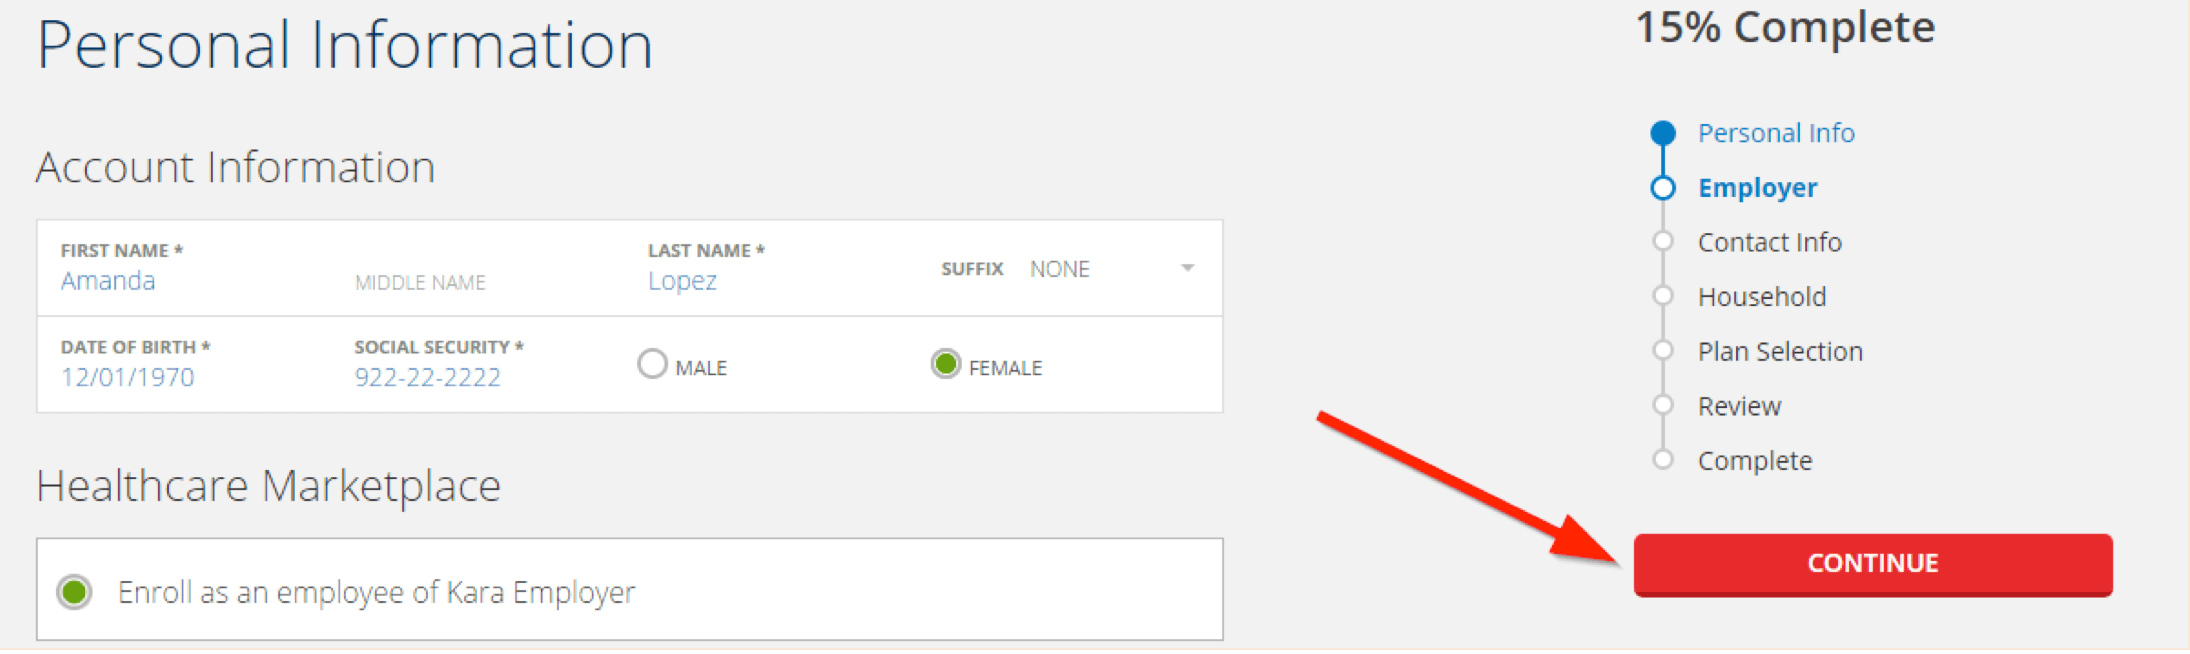
Fill out your personal information (name, DOB and SSN) and then click the red “CONTINUE”.

Your Information – Step 2:
The Health Connector will match you to your employer by verifying your date of birth (DOB) and Social Security Number (SSN). Click “Continue” if the employer information displayed is correct.
NOTE: If you are not matched to an employer, confirm you have entered your SSN and DOB correctly above. If you are still not matched to your employer, confirm your employer has your correct SSN and DOB and that you have been added to the employee roster.
Your Information – Step 3:
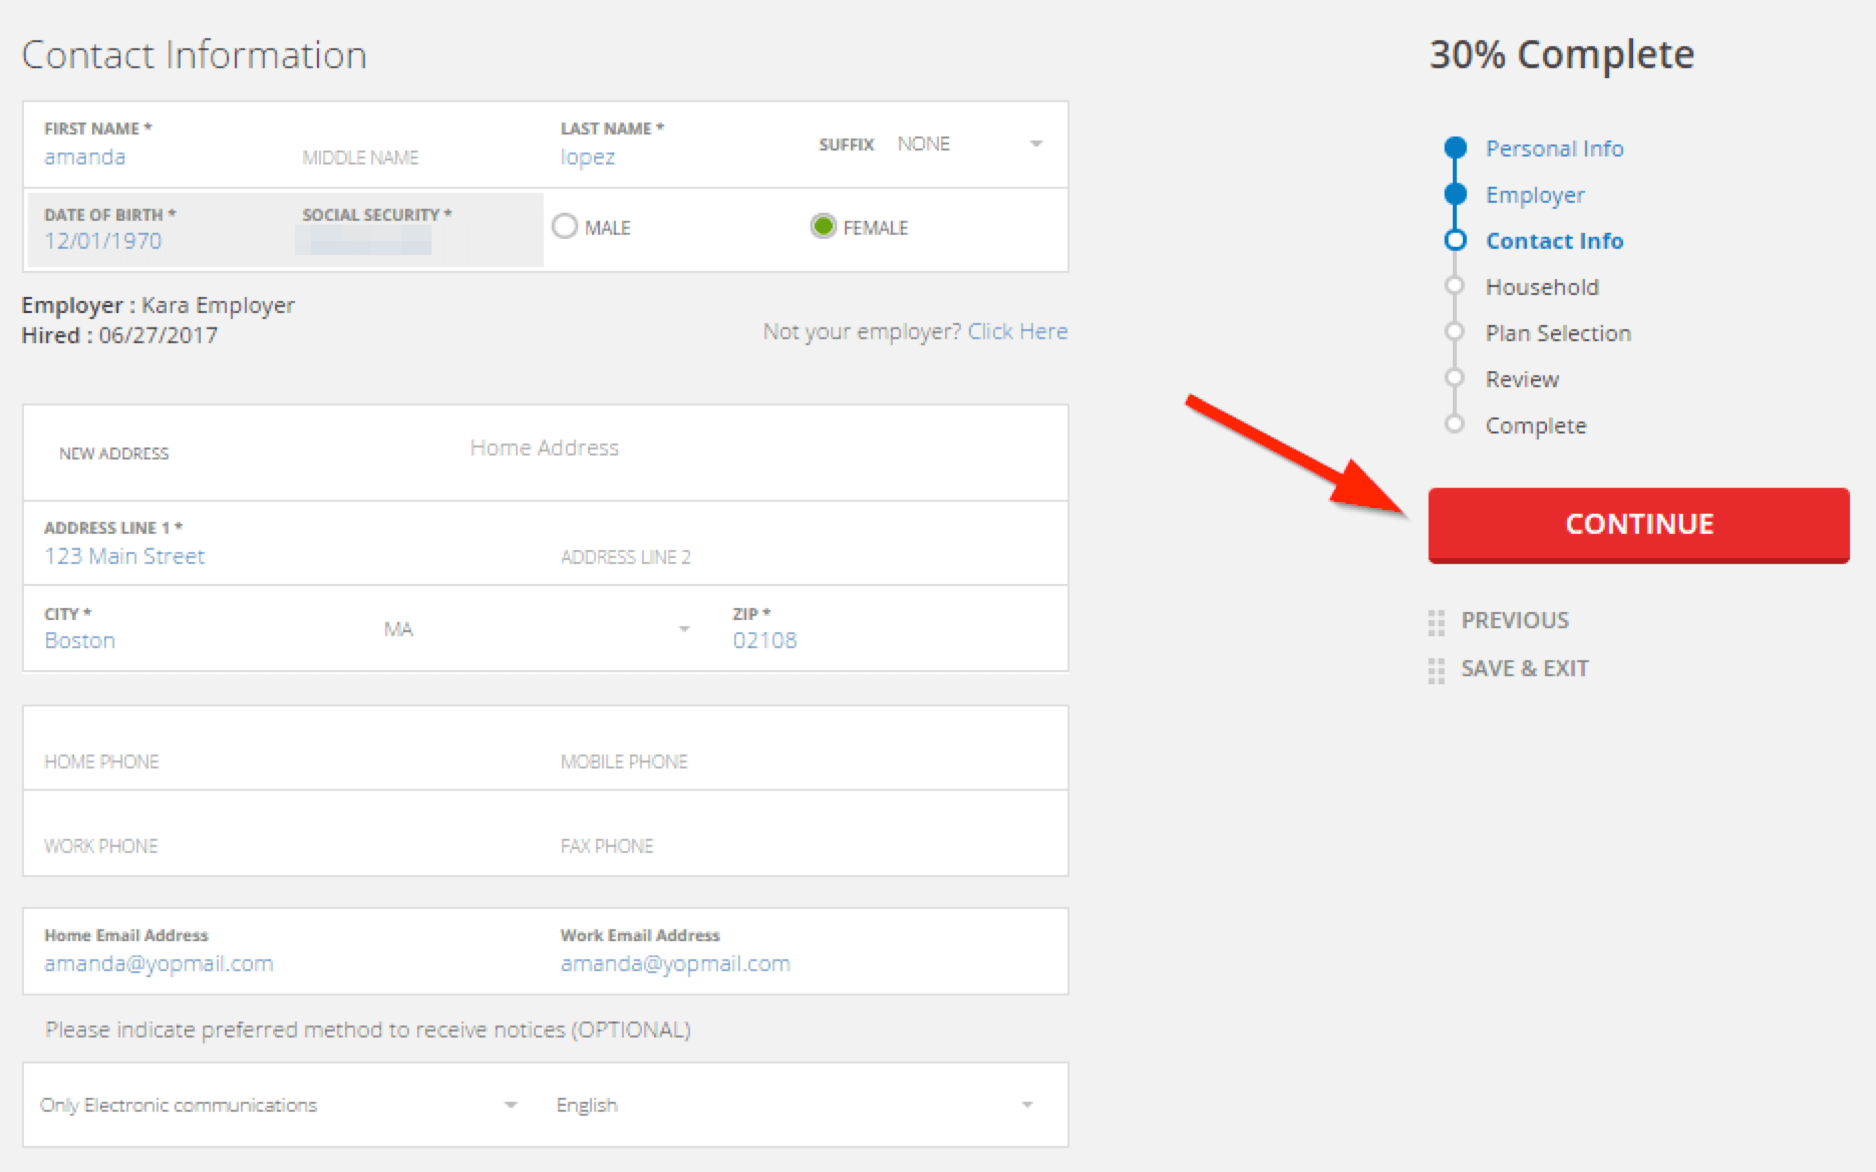
Fill out your contact information where needed, such as your address, email address, and phone number. The pre-populated information was submitted by your employer but may be edited by you. NOTE: By default, you opt into receiving electronic communications. To change this selection, select “only paper communications” or “paper and electronic communications” from the dropdown menu at the bottom of the form.
Once you complete the form and confirm the information is correct, click the red “CONTINUE” button.

Your Family’s Information
Family Information – Step 1:
To add a family member to your employer sponsored coverage, click “Add Member”. If you are not adding a family member, proceed to Shop for a Health Plan.

Family Information – Step 2:
Fill out the required information for your family member(s), including their relationship to you. Once you have filled in all the demographic information, complete the addition of your family member by clicking “Confirm Member.” Repeat this step until all of your family members are added and then click the “Continue” button on the same page.
NOTE: Later you will select which of these members you wish to cover.

Family Information – Step 3:
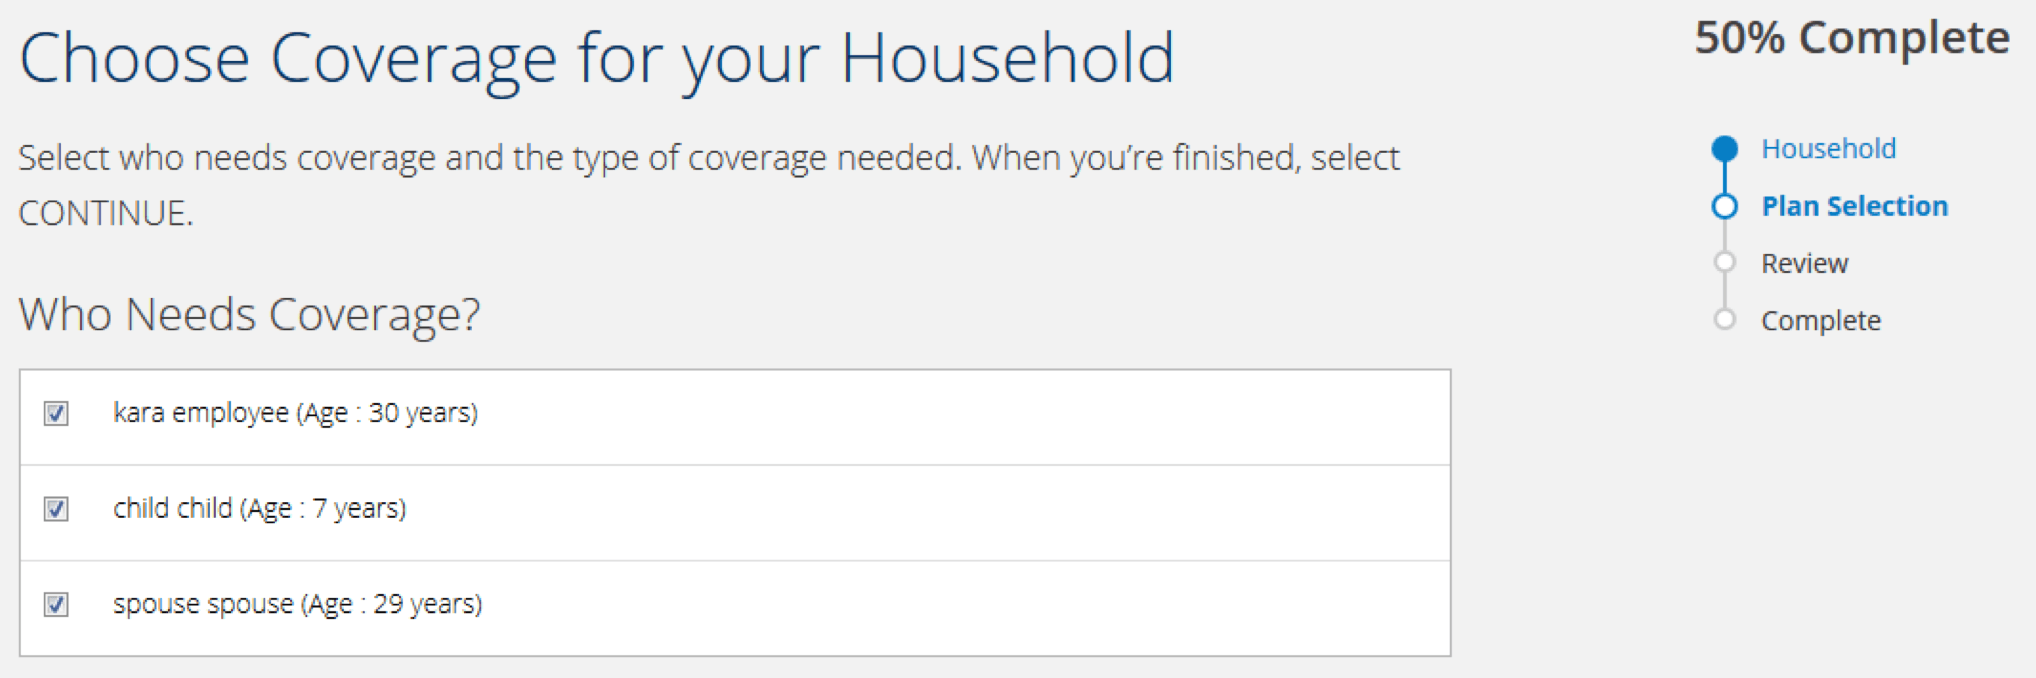
Indicate which family member(s) you would like to cover by selecting or unchecking the checkbox next to their name. Once the intended family member(s) are selected, click the red “CONTINUE” button to continue to plan selection.
NOTE: You may select the “Back” button on your browser to change your covered family member(s) during your plan shopping experience. During your open enrollment period or special enrollment period you may go in and add/drop dependents from your coverage even after you have enrolled in a plan.
Shopping for a Health Plan
NOTE: To Waive Coverage, proceed to the Waiving Coverage section.
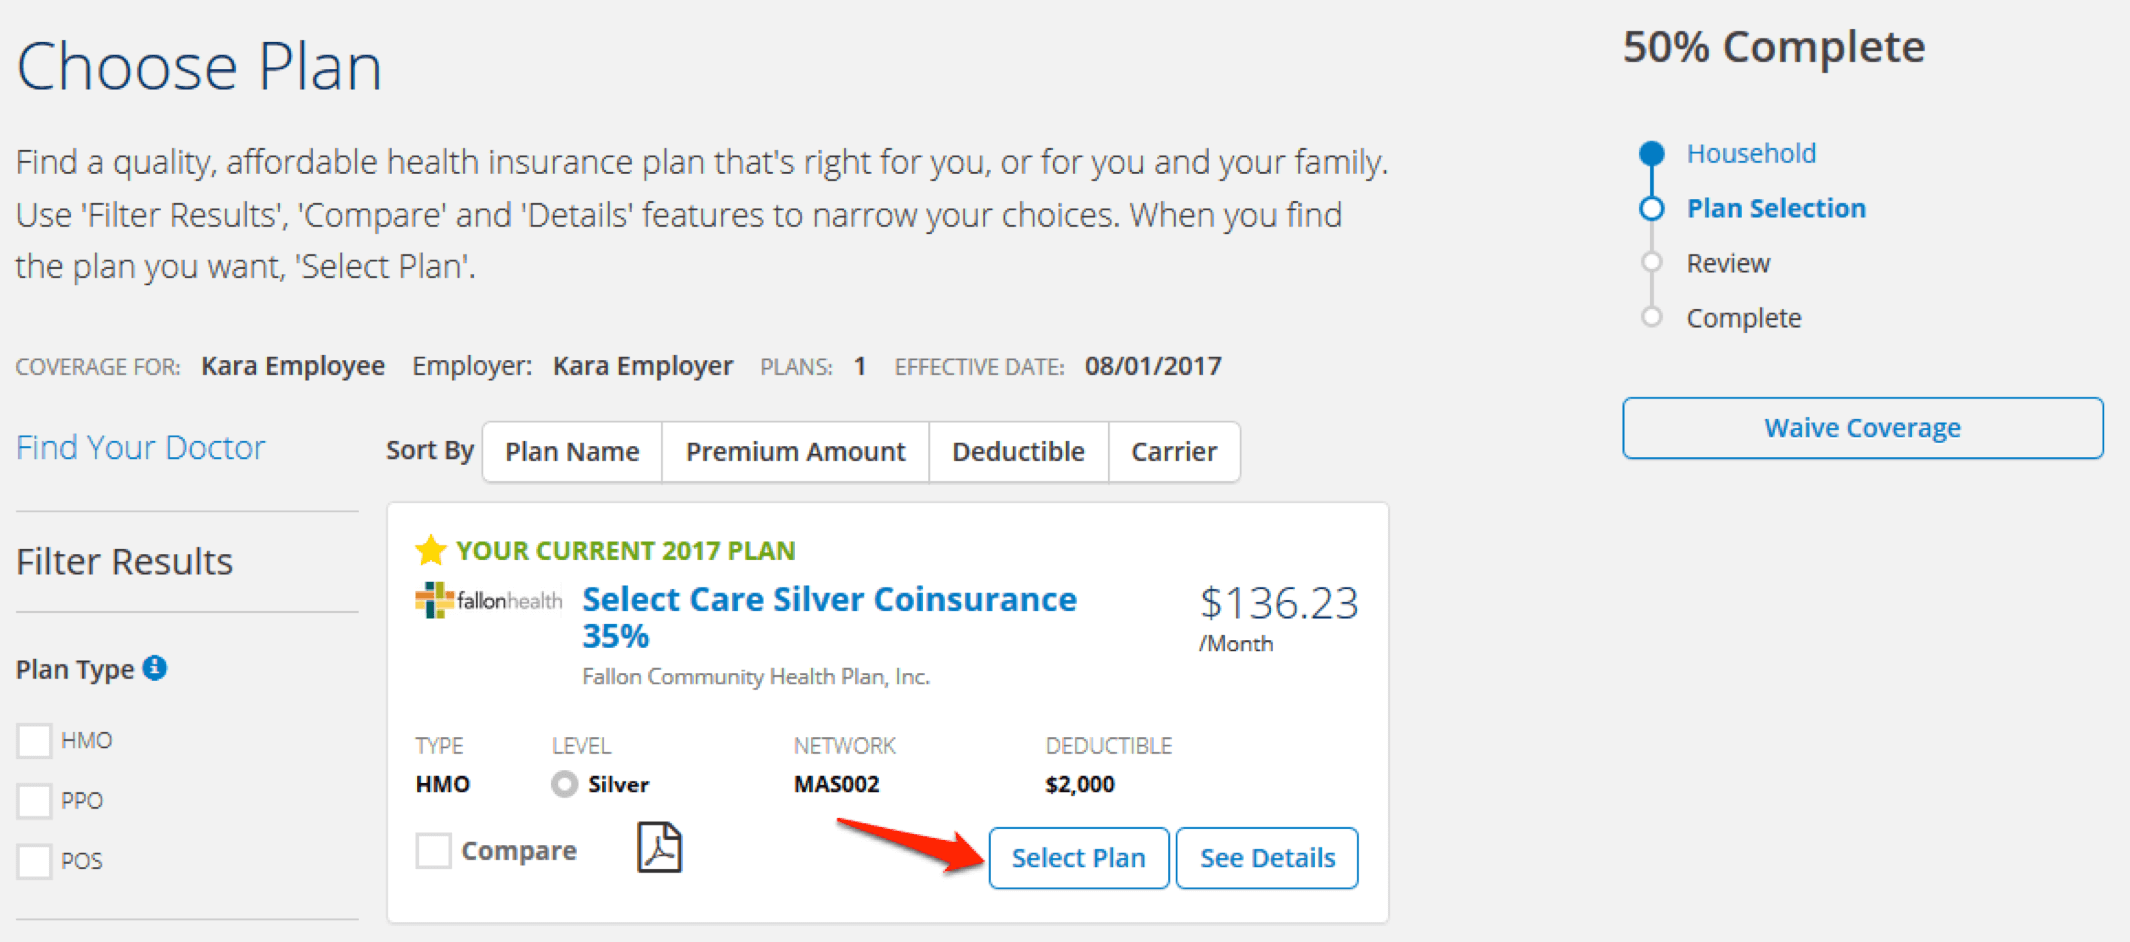
Health Shopping – Step 1:
Select your plan by clicking the blue “Select Plan” button.
Health Shopping – Step 3:
Review the information listed then click the “Confirm” button.
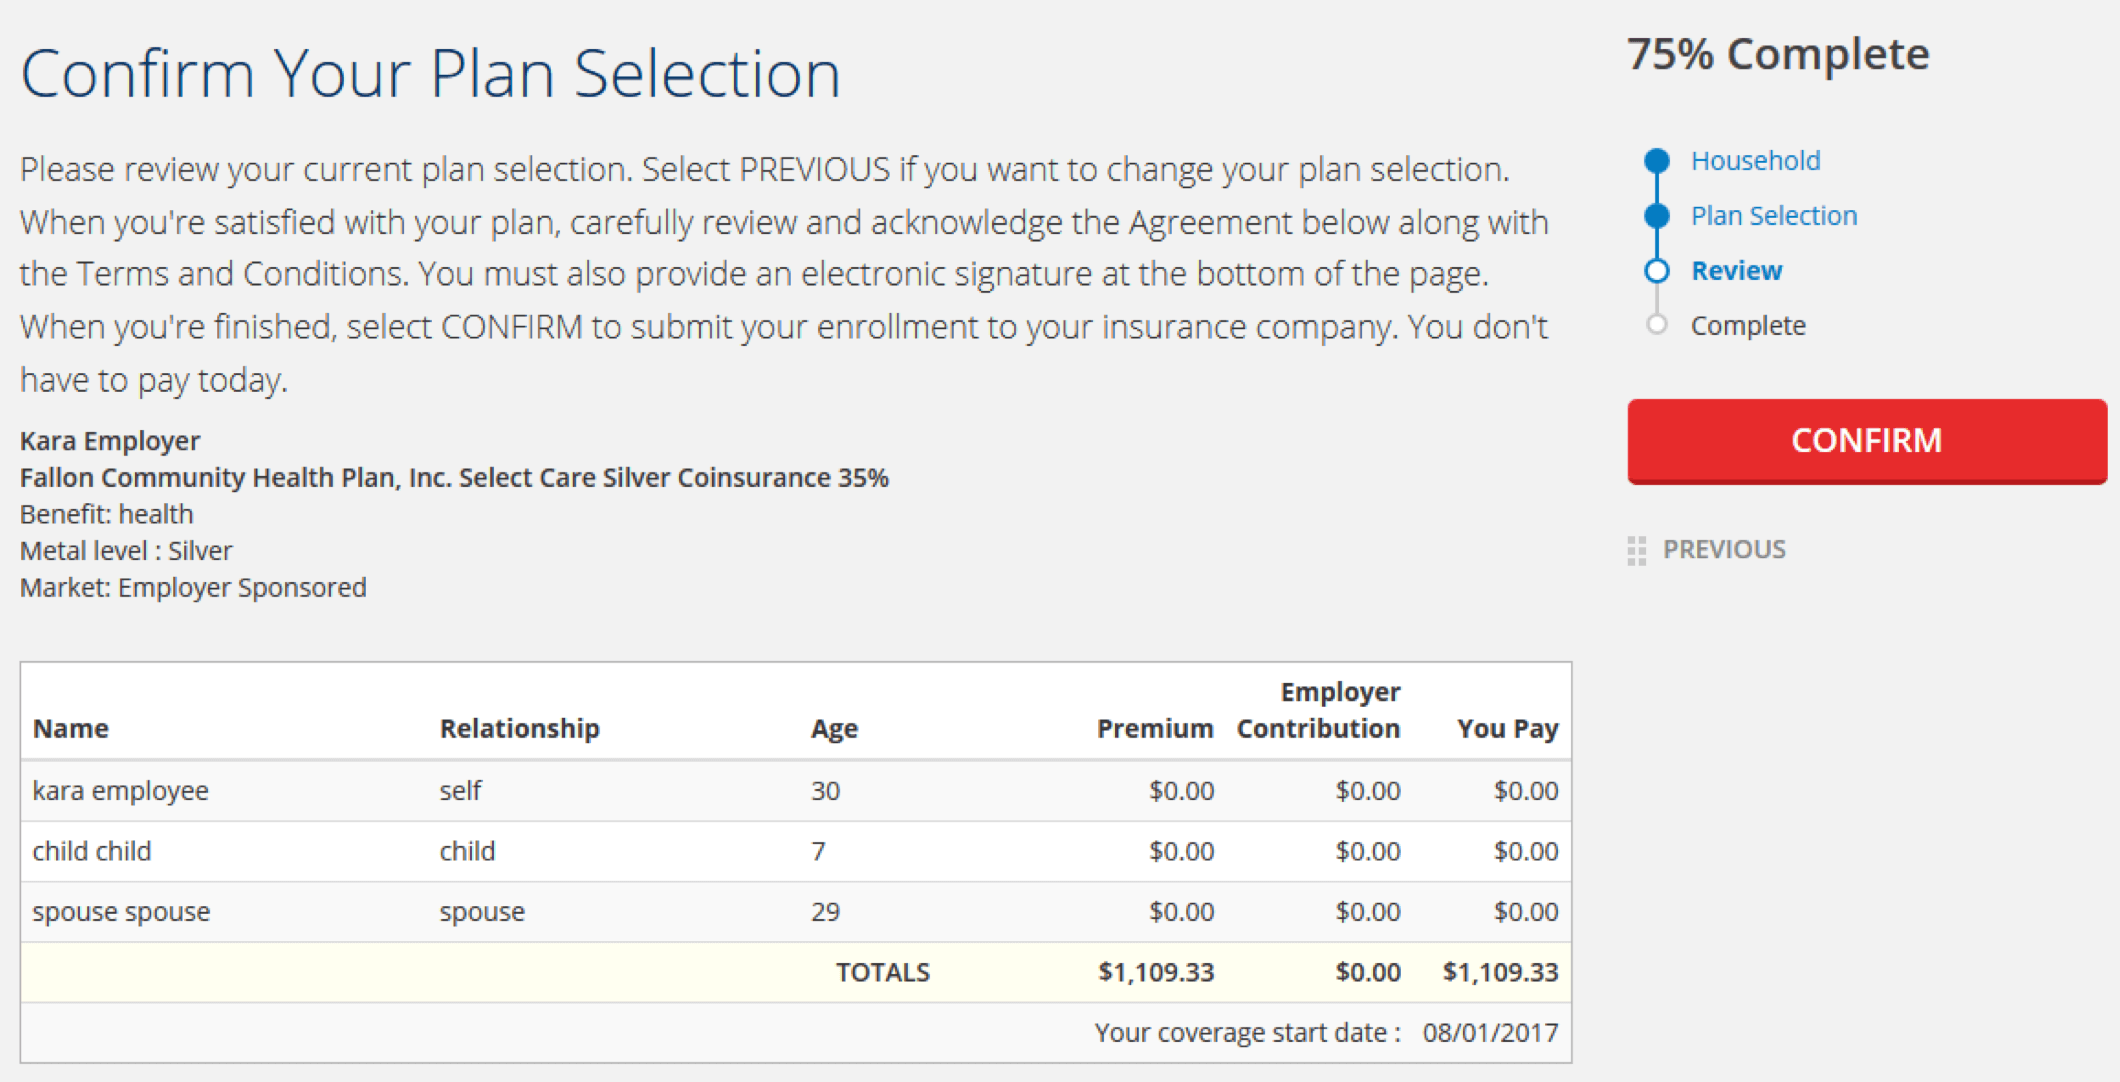
NOTE: To return to a previous page, select ‘Previous’ listed at the bottom of the right column.
Health Shopping – Step 4:
This is a summary page confirming your plan selection. To navigate to your account home page, click the red “CONTINUE” button.
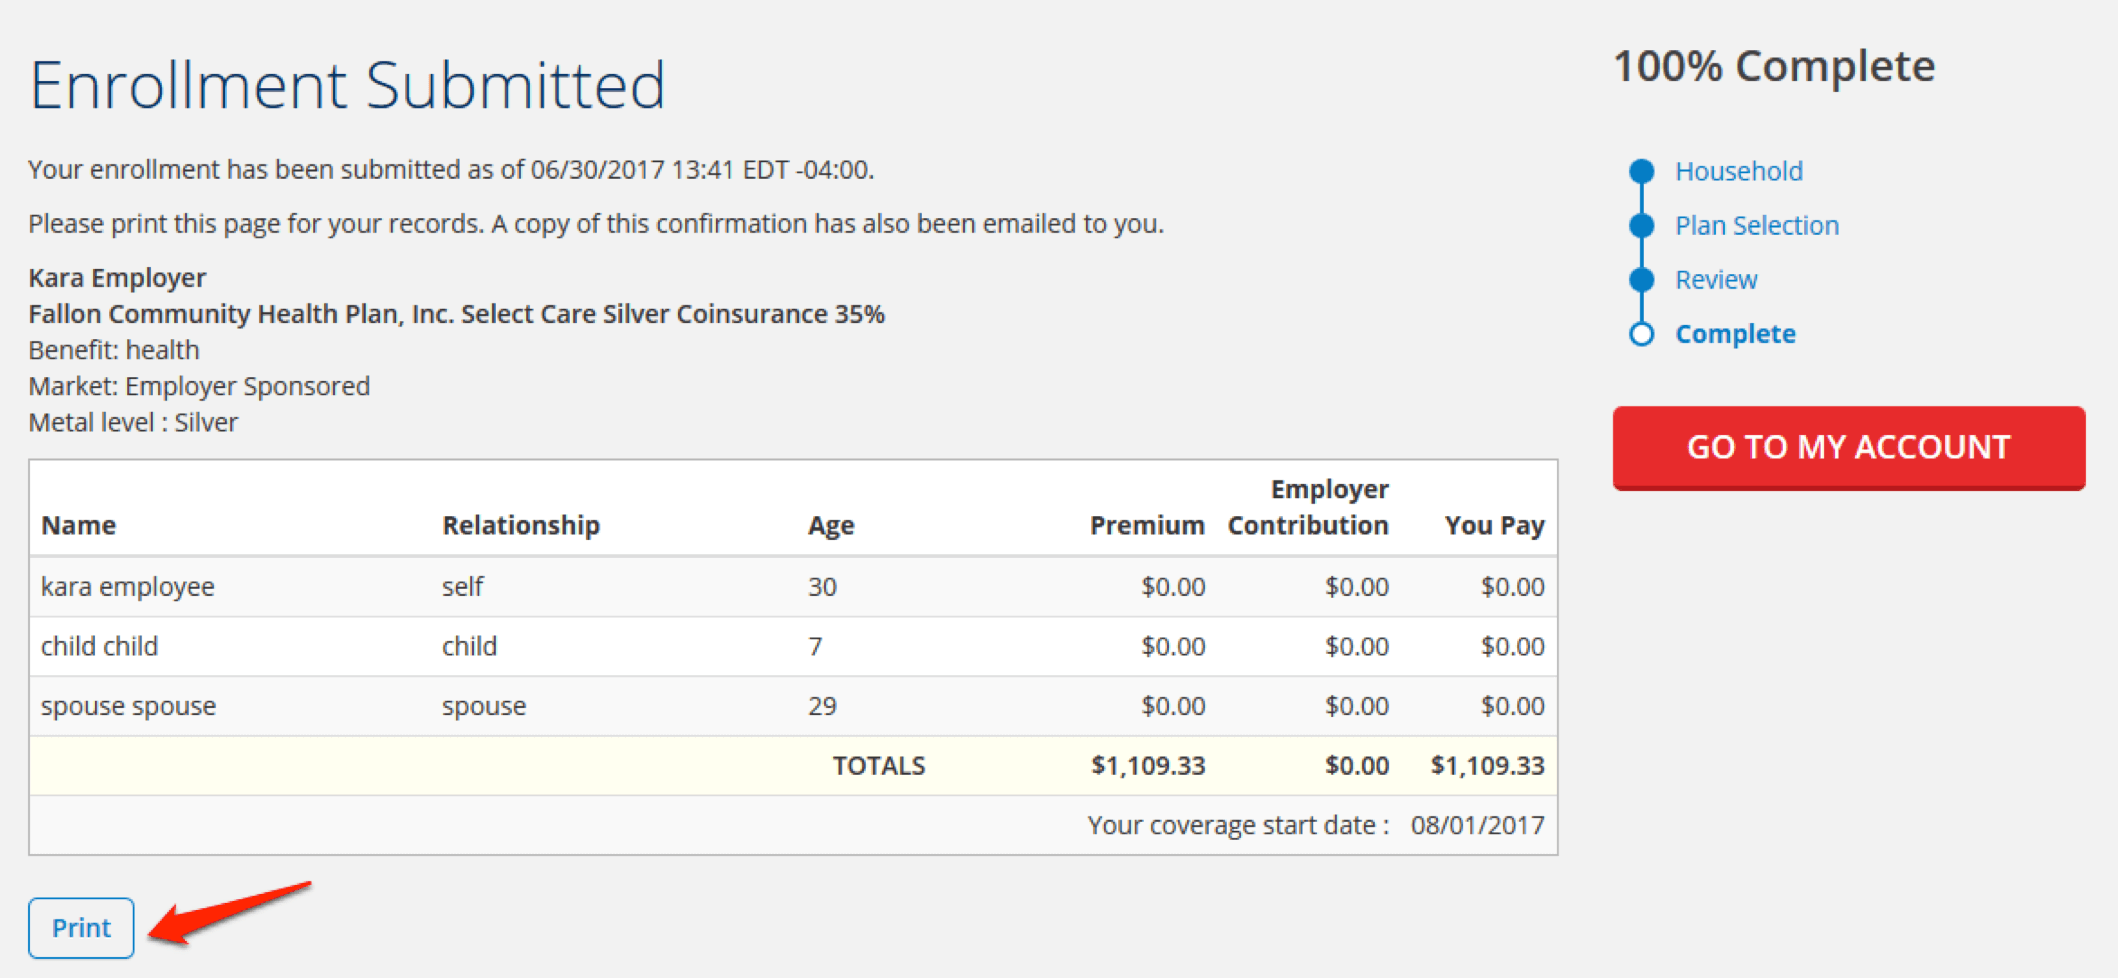
Health Shopping – Step 5:
You will now see your enrollment summary. To view more information about your plan, click the “VIEW DETAILS” button. If you want to change your plan during your open enrollment period, click the “Make Changes” button.

Waiving Coverage
Why should you waive coverage? When you are first eligible for your employer’s health coverage, you need to either enroll in a health plan, or if you have other coverage already, complete a waiver of enrollment.
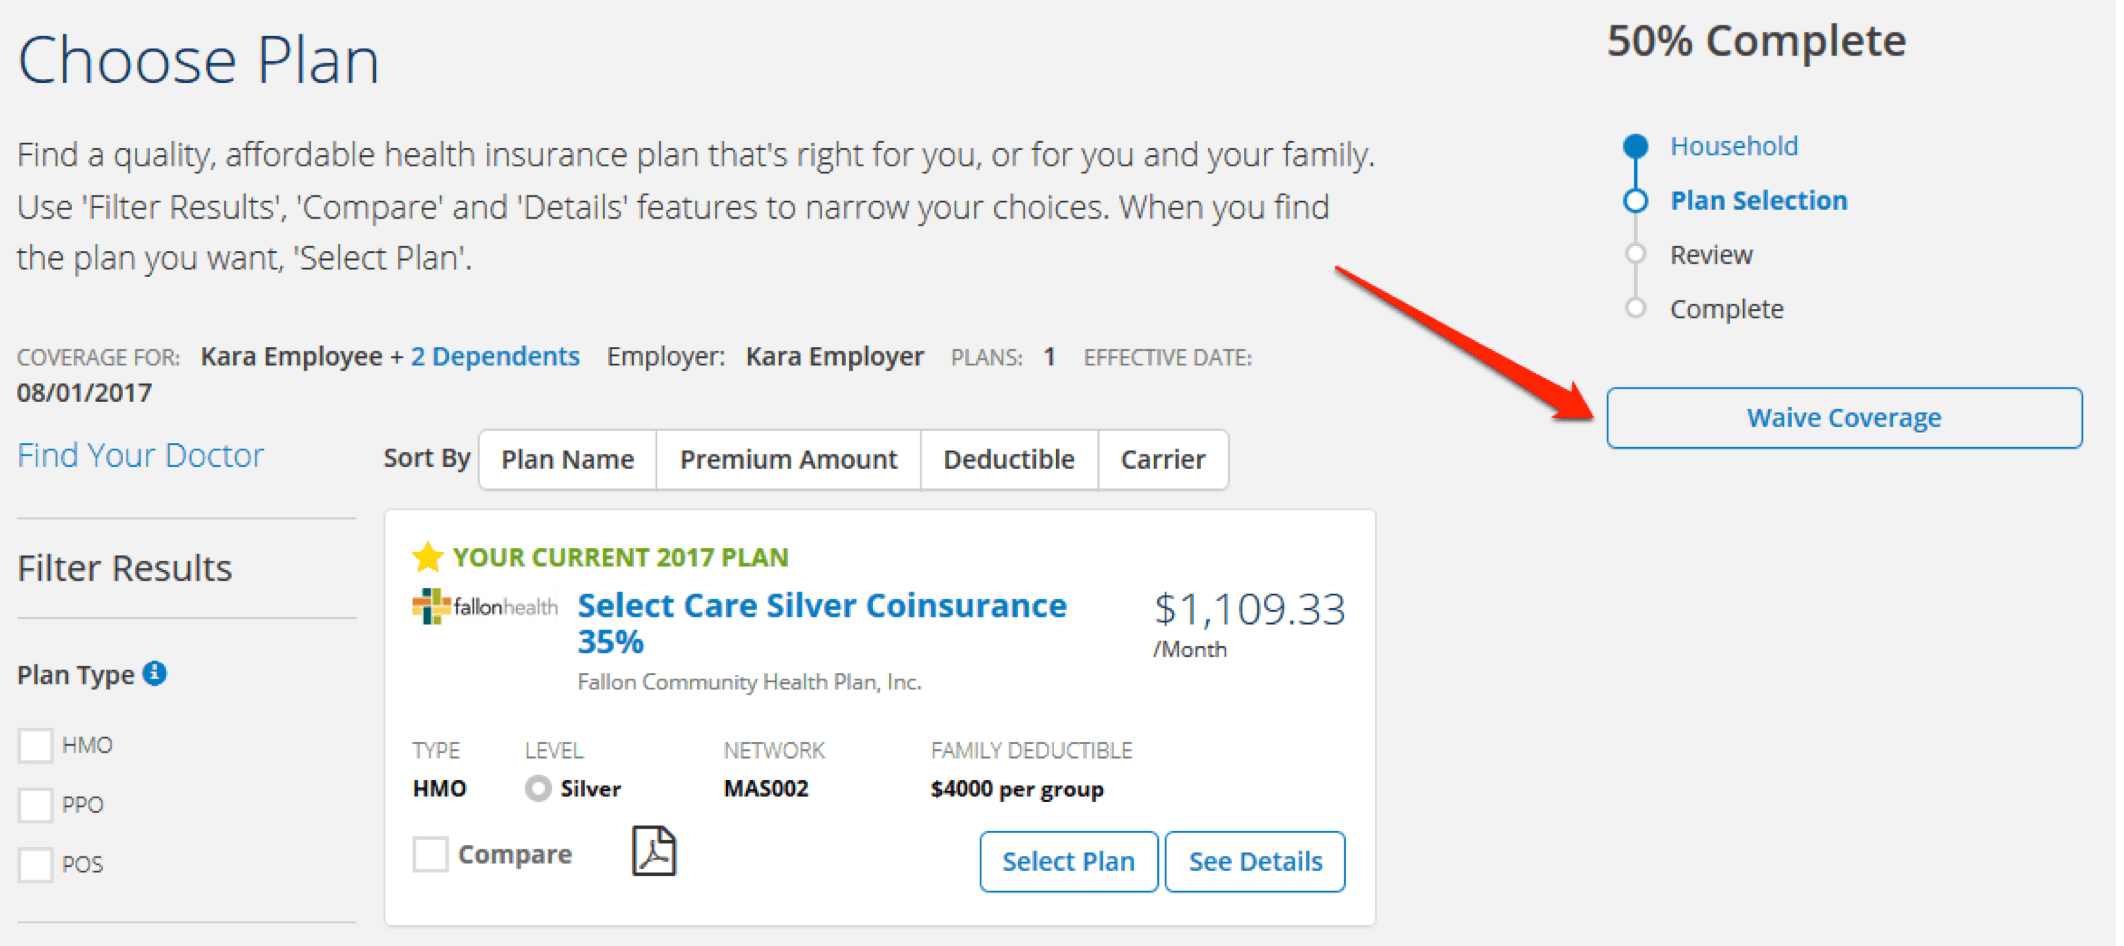
Waiving Coverage- Step 1:
To waive employer-sponsored health insurance coverage, click the “Waive Coverage” button on the right side of the screen.
Waiving Coverage- Step 2:
Click on ‘Select Waive Reason’ and choose your reason for waiving employer sponsored coverage.
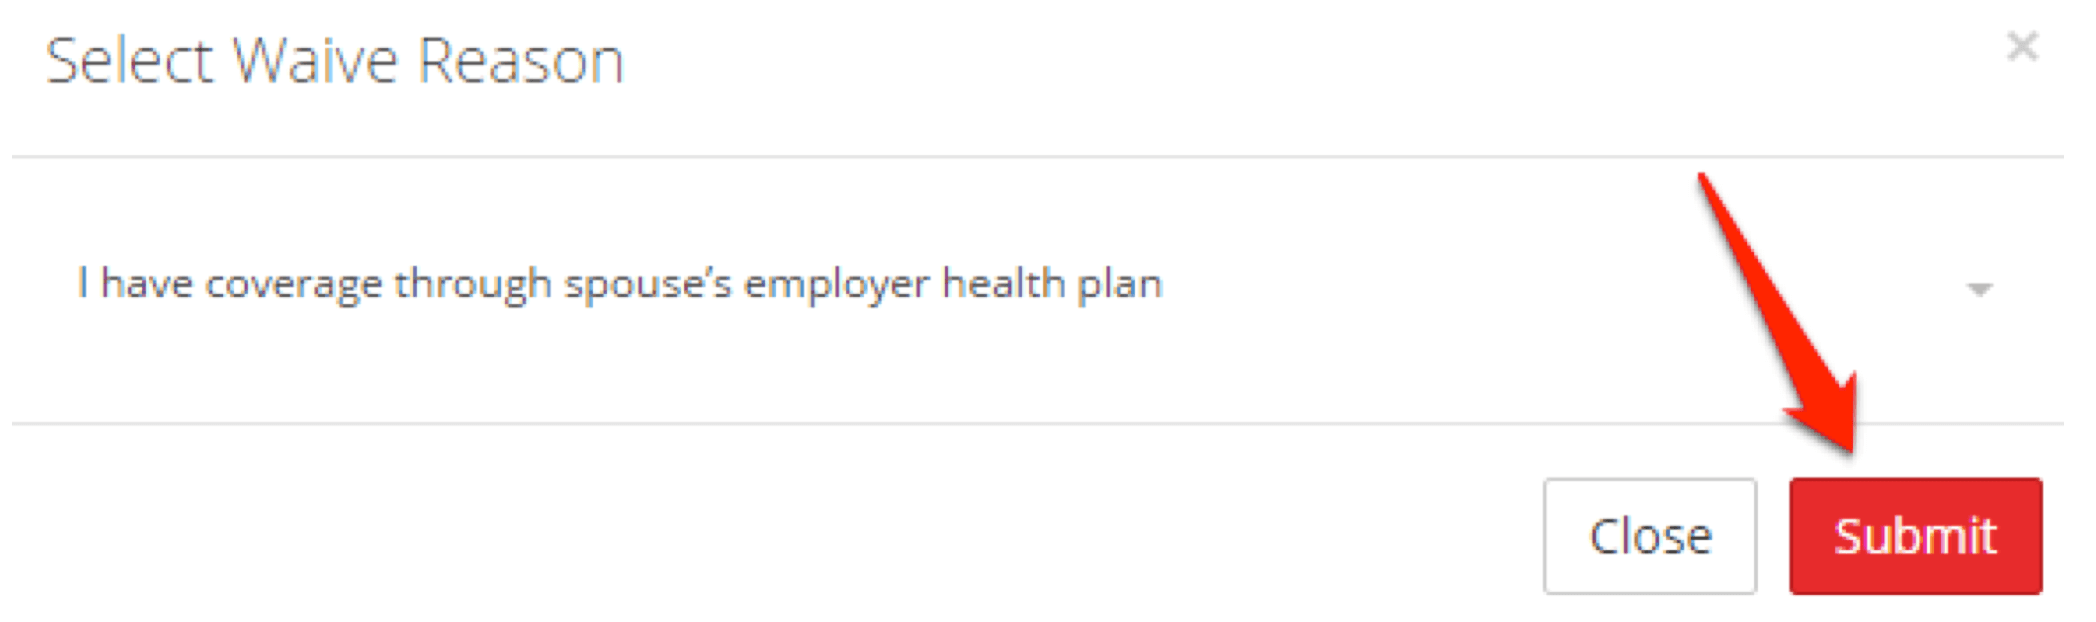
Waiving Coverage- Step 2:
Once you select your reason, click the red “SUBMIT” button.
Waiving Coverage- Step 3:
Congratulations! You have successfully waived employer-sponsored coverage. To navigate to your “My Account” page, click the red “CONTINUE” button.
NOTE: If you decide you would like to browse plans offered to you by your employer during your open enrollment period, you may click the “Shop for Plans” button in the middle of the screen. To select coverage due to a Qualifying Life Event (QLE), please refer to our employee assistance guide- Experiencing a QLE.