


Who is this guide for? Employers who offer coverage through the Health Connector for the first time. New employers may be offering health coverage to their employees for the first time, OR they may have previously offered employer-sponsored coverage outside of the Health Connector.
Get Started – Setup Your Account
Click on the “CREATE ACCOUNT” menu and select “Employers”. Or, click here now to create an account.
Create Your Employer Account
Fill out your email address and create a password (8 characters minimum) and then click the “CREATE ACCOUNT” button.
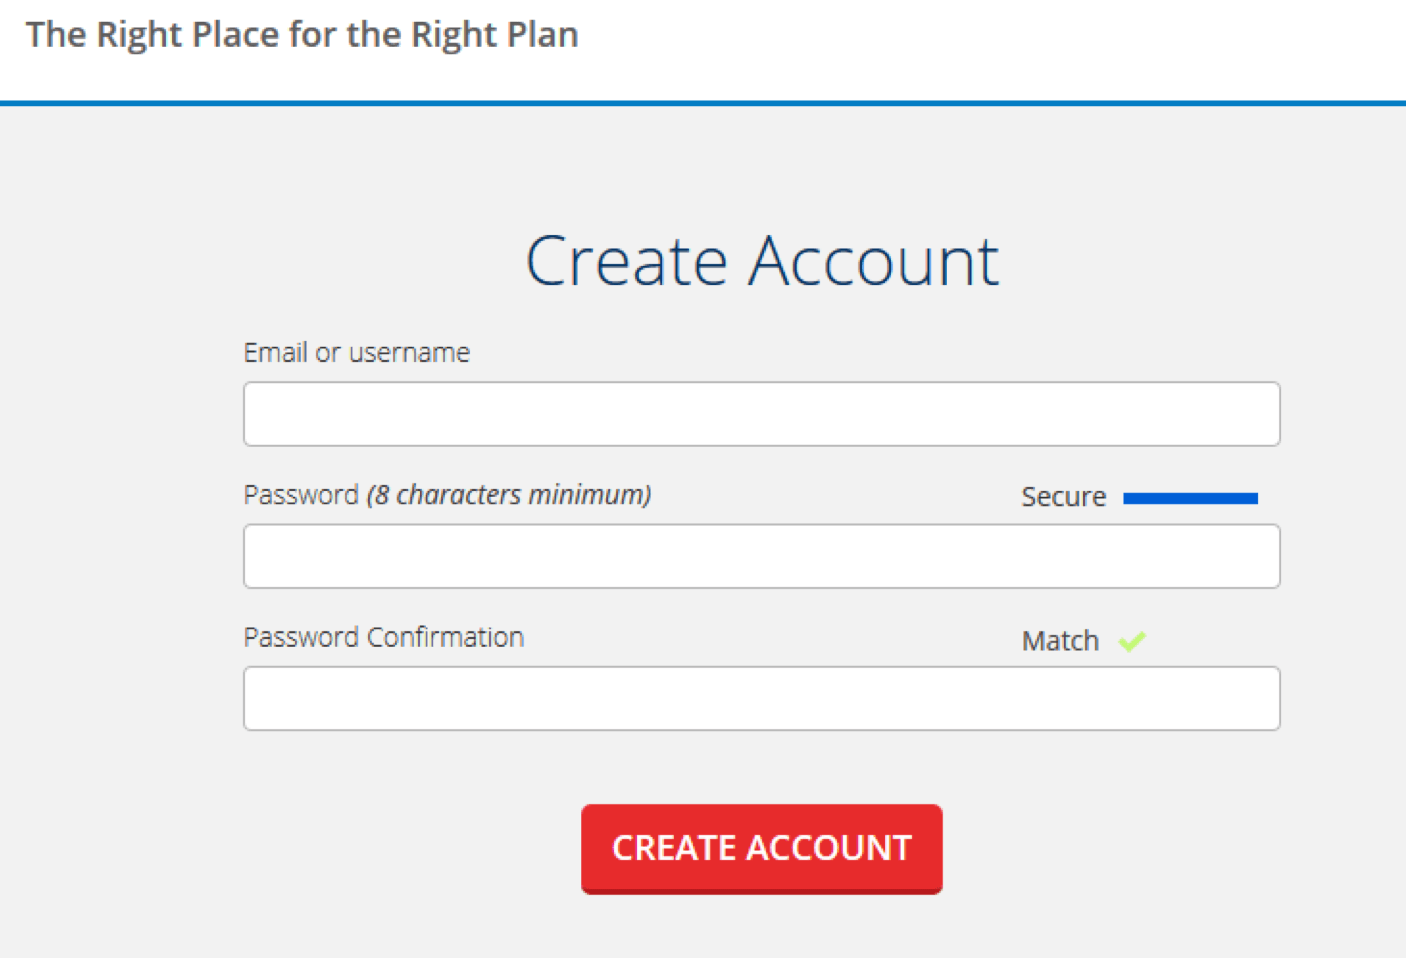
NOTE: Please be sure that you record your password somewhere secure. You’ll use your email address as your login in the future.
Next, provide some basic information about you and your business. As the point of contact for the small business, provide your name and date of birth. Then, provide information about the small business, including company legal name, DBA name, federal employer identification number (FEIN), entity kind, and primary office location then click the “Create Employer” button. If you have more than one office location click “Add Office Location” and fill in the information for your other location(s) before proceeding to “Create Employer”.
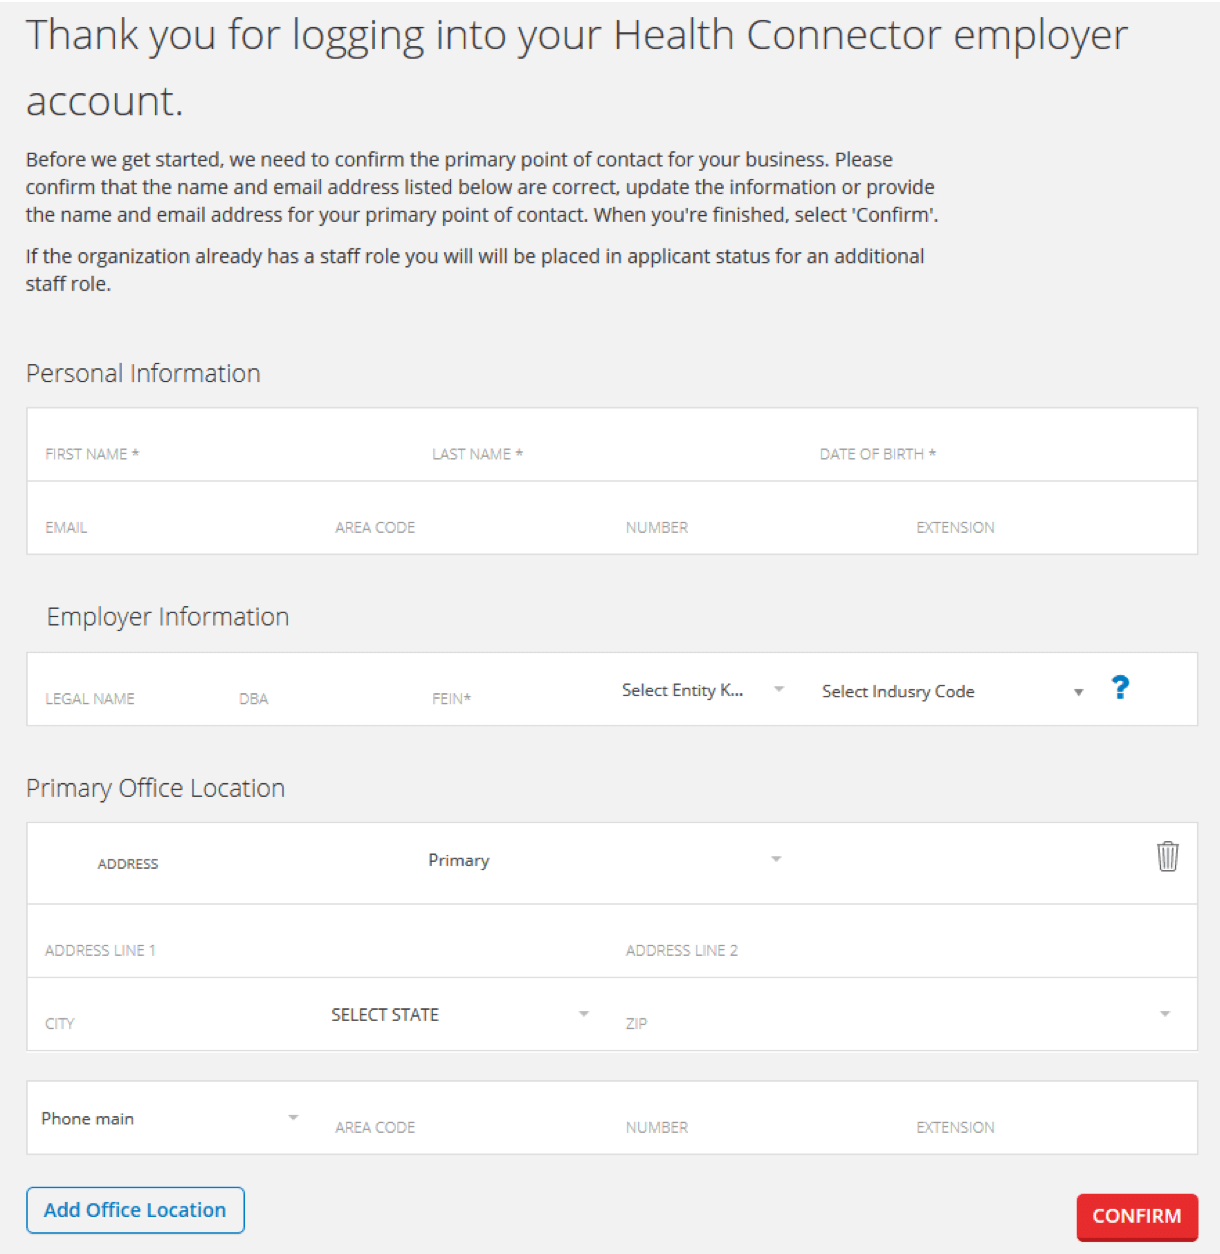
NOTE: Brokers setting up accounts for Employers MUST use the information for the POC for the business and not their own information when filling out this section.
Add Your Eligible Employees to Roster
Creating Your Employee Roster:
- IMPORTANT – Make sure that the date of birth and SSN is accurate for each of your employees. We use these to match the employee to your coverage. If the information isn’t correct, the employee won’t be able to shop for health coverage until the discrepancy is resolved.
- Adding employee family members is not required but will help provide you with a more accurate cost estimate. When employees add family members to their accounts through their employee portals, your roster will automatically update as will your cost estimates.
- When adding employees to your roster you do not need to include the employee’s real mailing address. Your employer roster will update automatically when the employee creates an account and enters the correct mailing address.
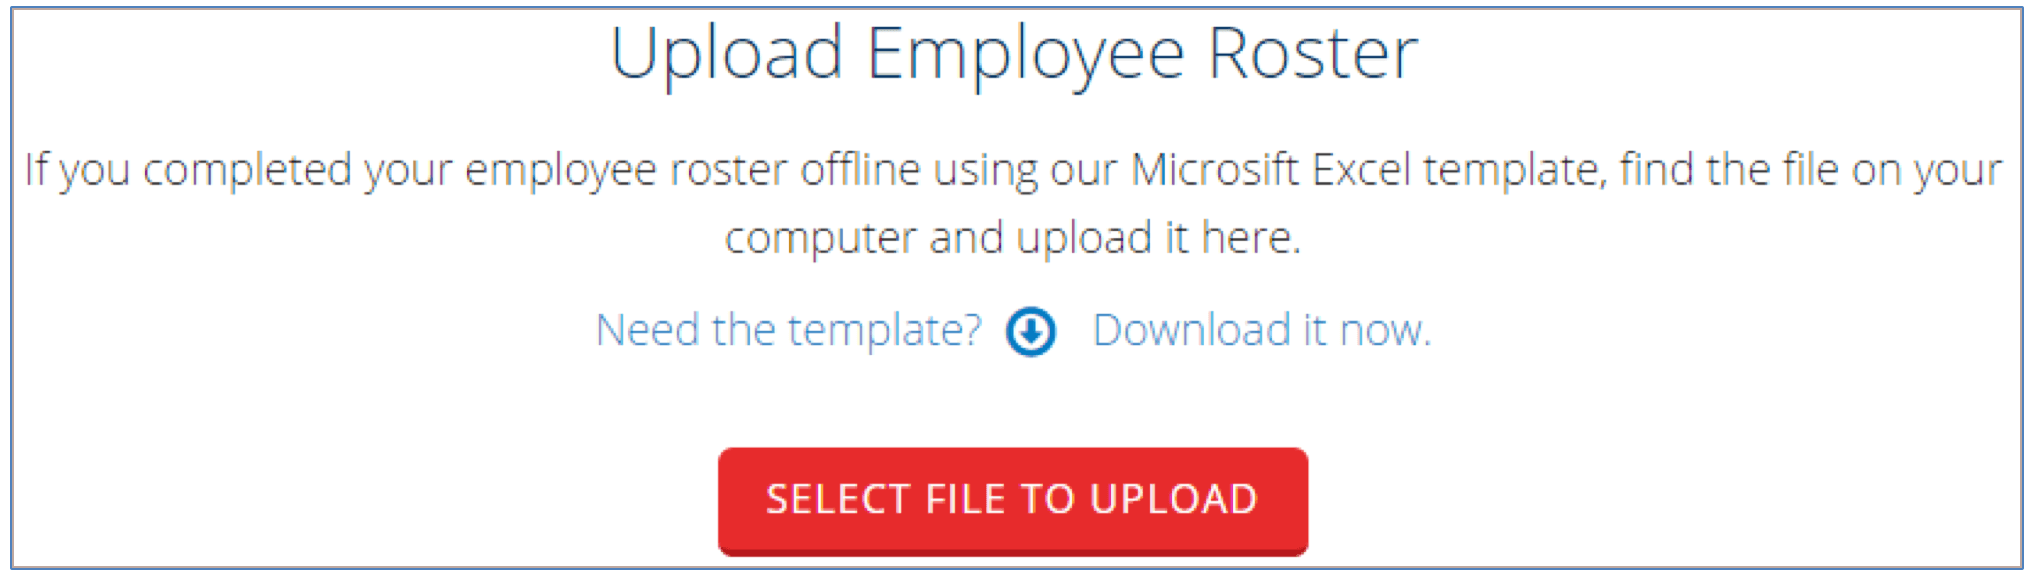
- You have the option to upload your employee roster in one click through spreadsheet. You can download the spreadsheet template from the roster upload page, or on the Forms section of MAhealthconnector.org.
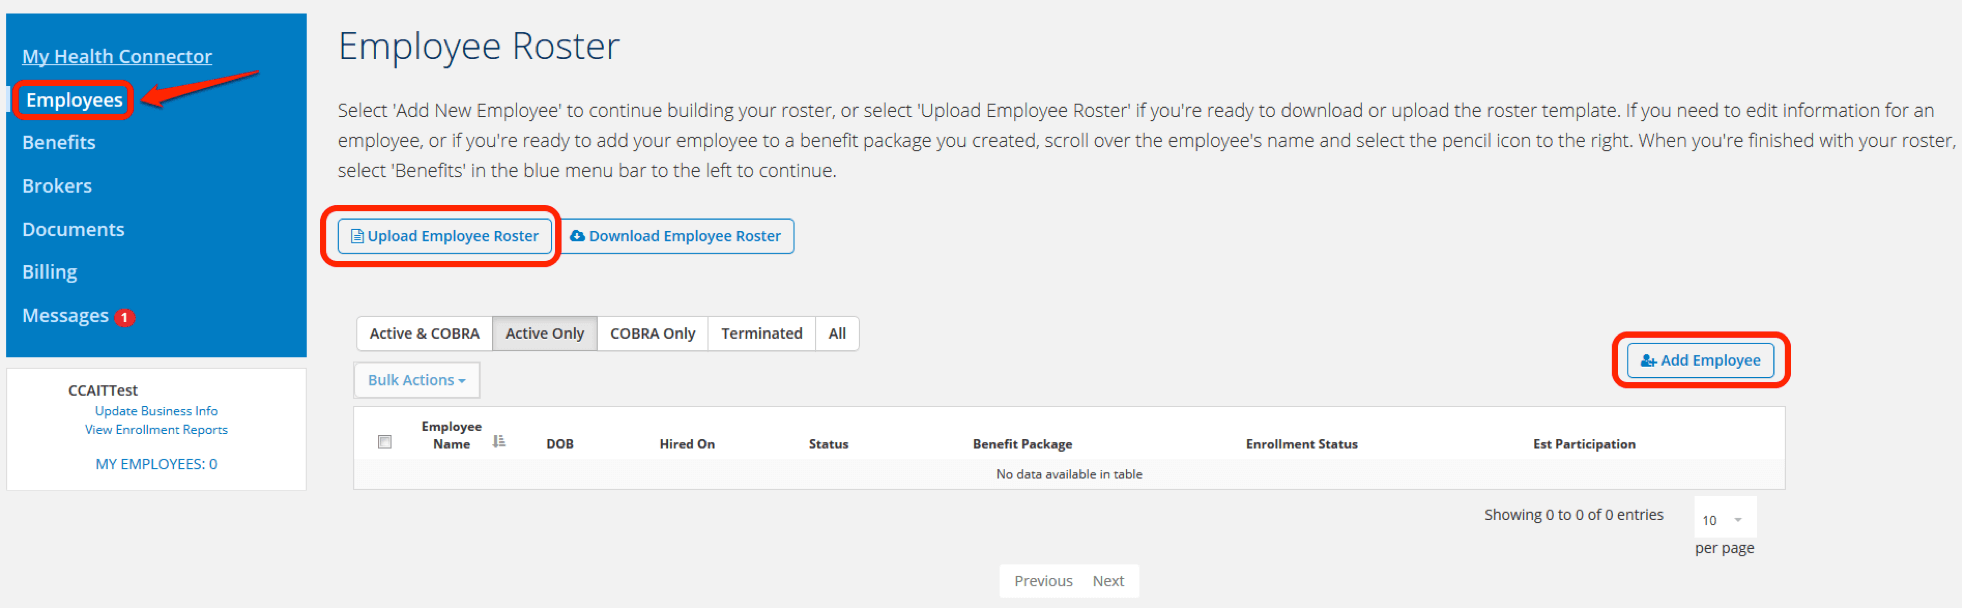
Add Employees to Roster – Step 1:
Select ‘Employees’ tab on the left side of your screen. Next, click the “Add Employee” button.
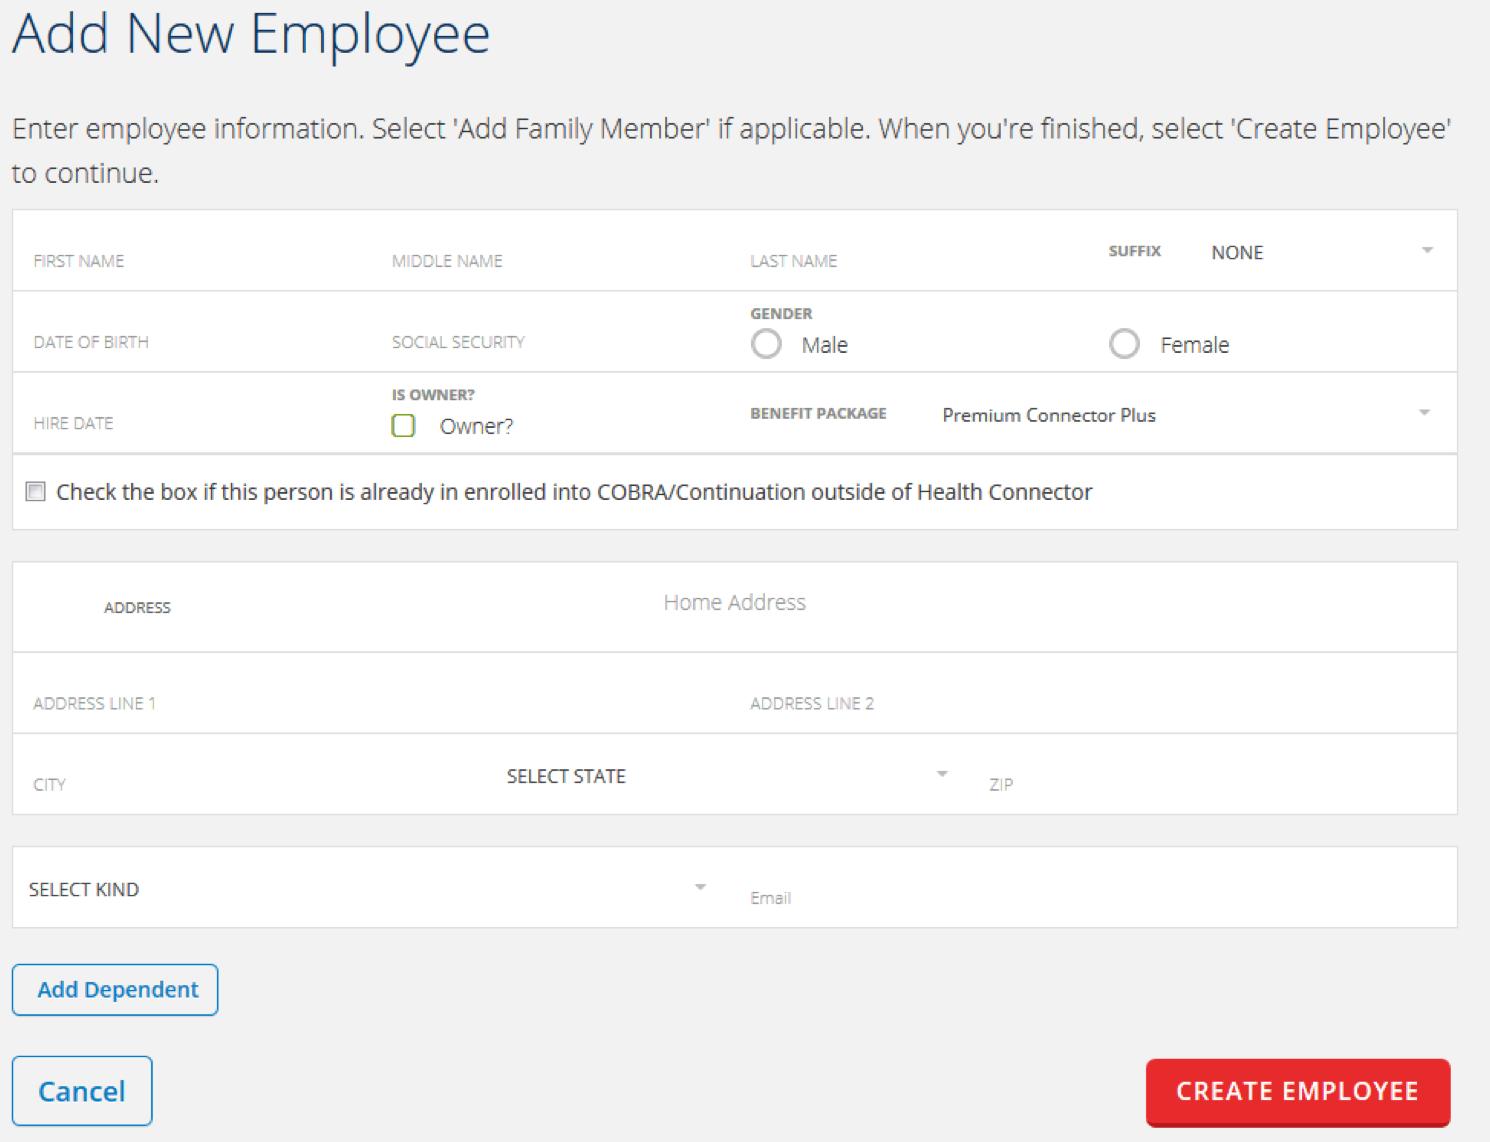
Fill out your employee and applicable dependents information. Your employees are able to add dependents when they create their account if you do not want to add them at this time.
NOTE: For the most accurate cost estimate, include any dependent information you have on the roster. The cost of dependent coverage will not reflect in your cost estimates unless they are on the roster.
Add Employees to Roster – Step 2:
Enter the information for your employee and click “Create Employee”.
Continue to click “Add Employee” AND “Add Family Member” until your roster is complete.
NOTE: If you have not created your benefit offerings for your employees at this time the benefit group will not be available. In this case you will come back and edit the employee to add the benefit group once your plan offerings are finalized.
Add Employees to Roster – Step 3:
To use a roster template, click the “Upload Employee Roster” button, then select “Download Employee Roster”, click the “SELECT FILE TO UPLOAD” button to upload a completed roster.

NOTE: Your roster view will default to “Active” employees. To view “Terminated” or “All” employees select the “Filter by” drop down. Even under the “All” view only 20 employees at a time will show on the roster at a time. You can view all employees by clicking on first letter of their name under the roster.
Create Your Plan Year
What is a Plan Year? A Plan Year is all of the coverage options and contributions you are offering to your employees as well as any covered dependents for an entire year. This year begins when your group’s coverage starts and ends 12 months later. If you have multiple office locations, they are all part of the same plan year.
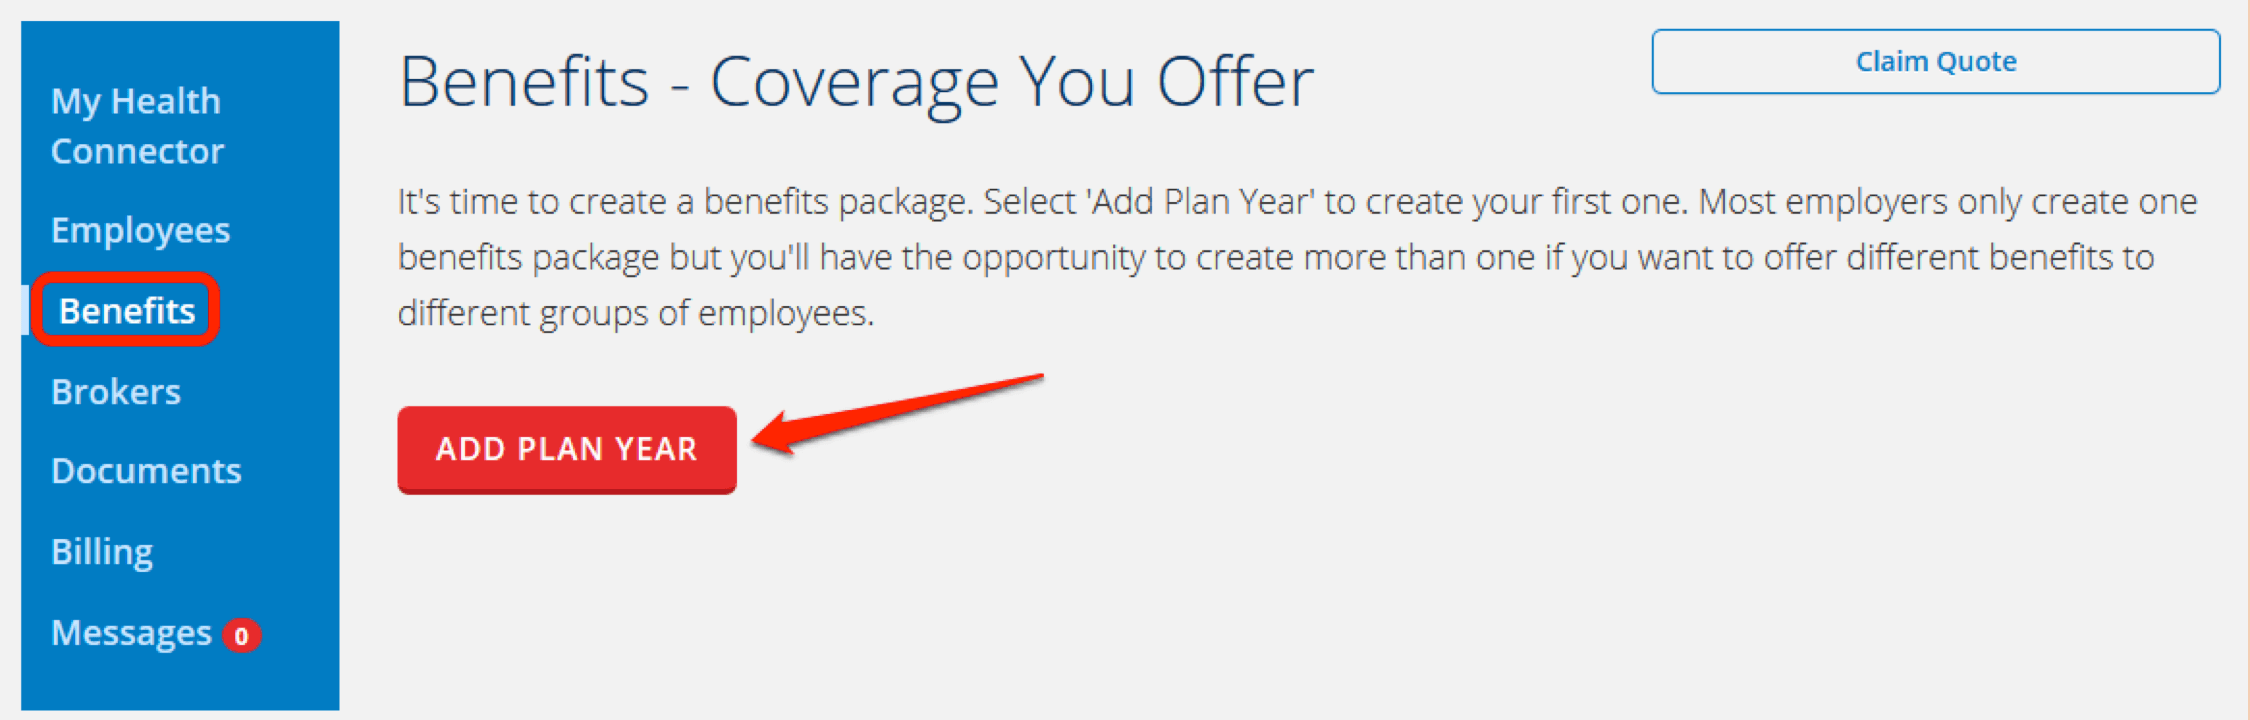
To create a plan year, click the “ADD PLAN YEAR” button.
Plan Year Creation – Step 1:
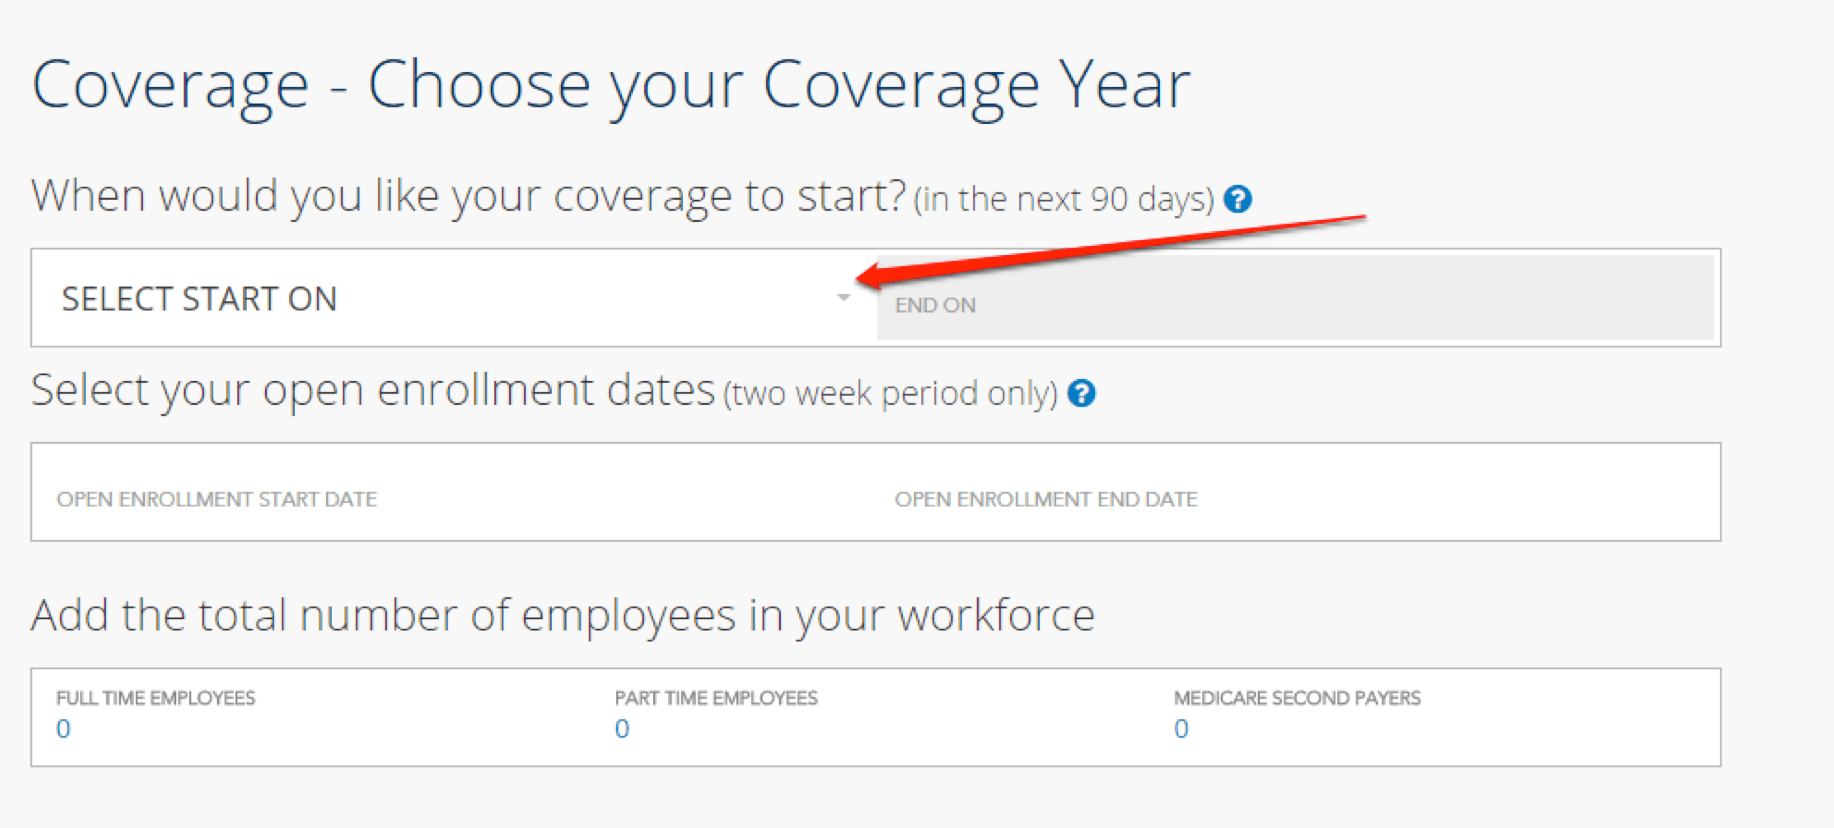
Click “SELECT START ON” drop-down and to select your plan year start date.
NOTE: Under “My Account” the “MY EMPLOYEES” count includes all employees – active and terminated.
Plan Year Creation – Step 2:
On the same page, under “Add the total number of employees in your workforce” enter in your number of ‘FULL TIME EMPLOYEES’, ‘PART TIME EMPLOYEES’, AND ‘MEDICARE SECOND PAYERS’. Once your dates are set, click the “CONTINUE” button.
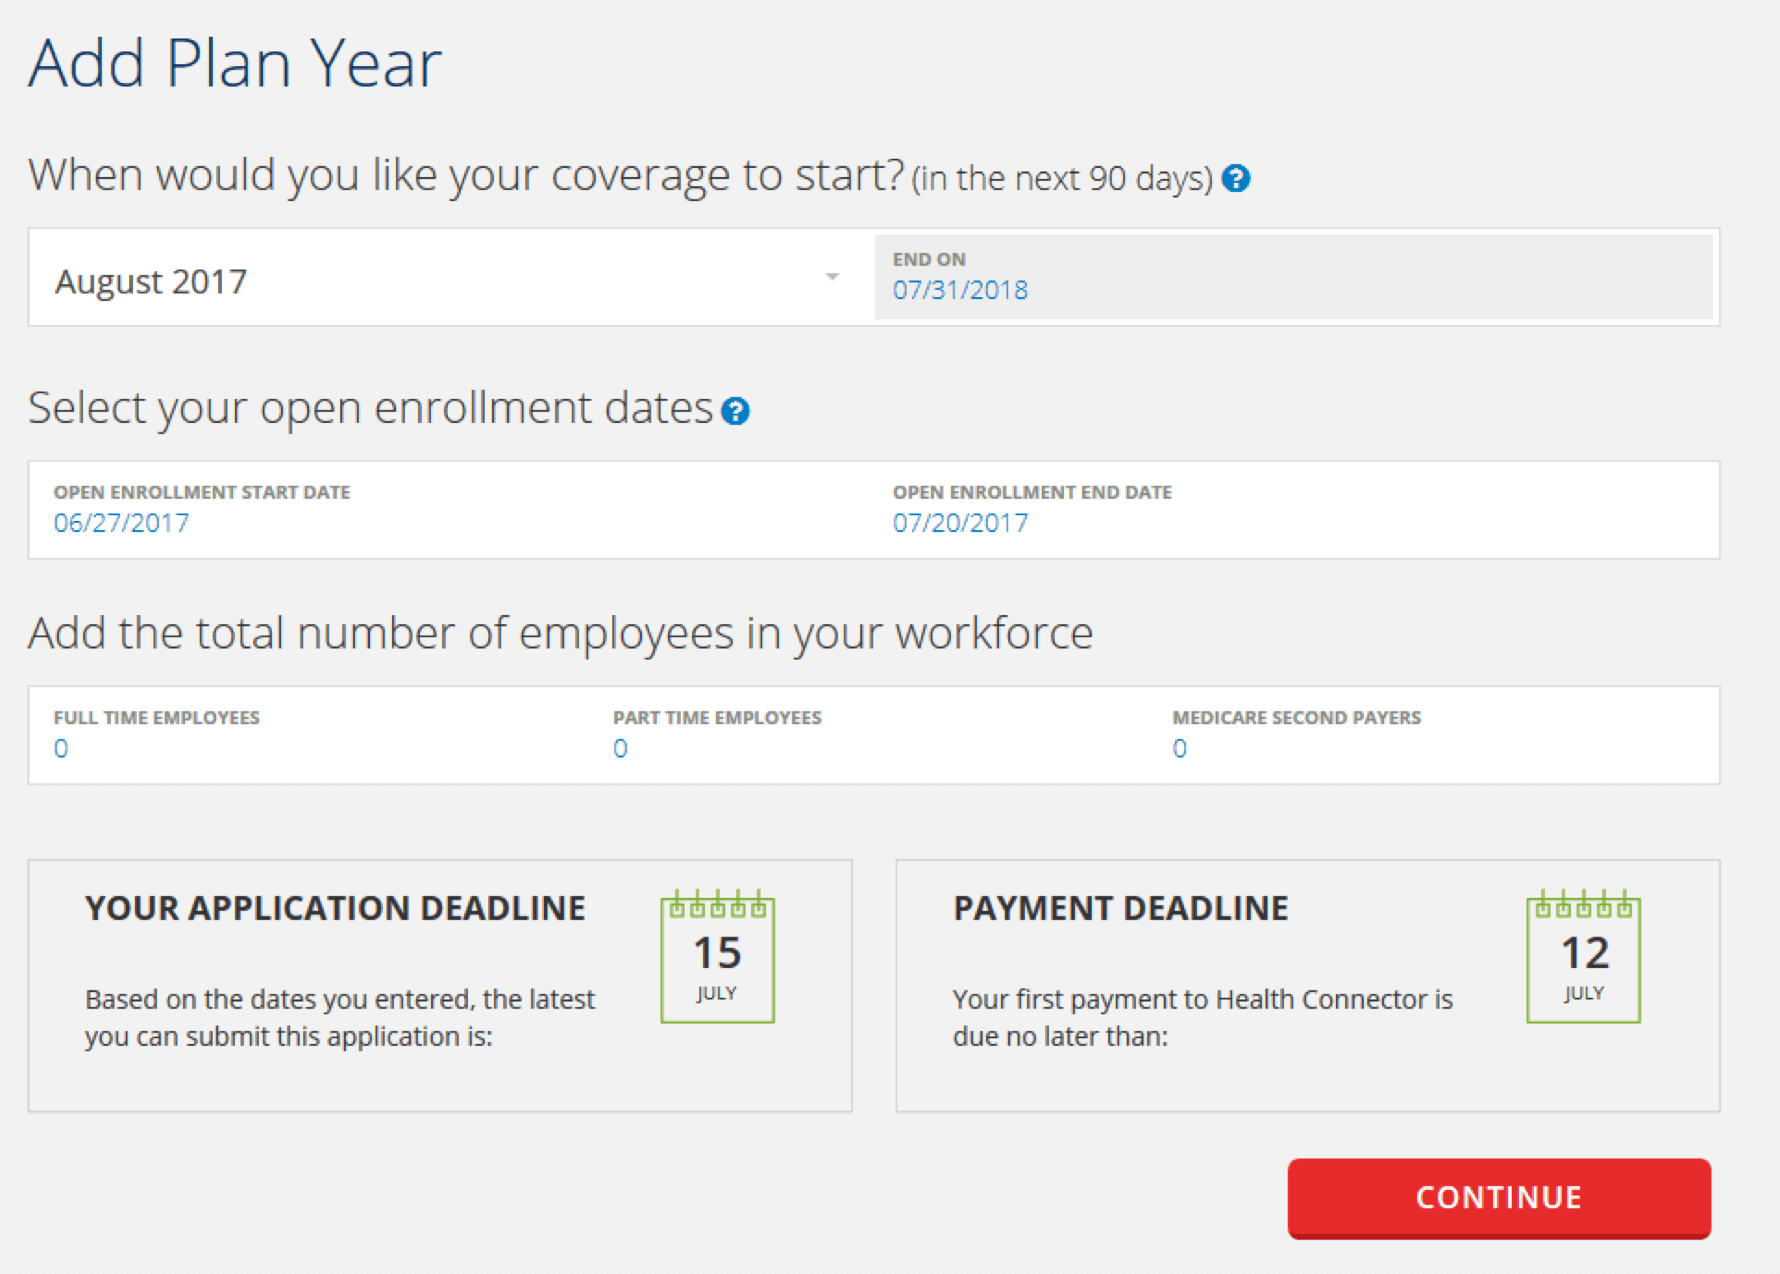
NOTE: Your potential open enrollment start and end dates will automatically populate with the earliest start date and the latest end date. The open enrollment period may start no earlier than two months prior to the coverage start date and must end by the 10th day of the month prior to the plan year start date. Your application and payment deadlines will appear on the screen.
Add Benefit Group to Your Plan Year
Your employees belong to a benefit group. The benefit group determines the plan offerings, contributions, and eligibility rules available to employees in the benefit group. Most employers will only have one group of benefits that they offer to all of their eligible employees.
Plan Year Creation – Step 3 :
Enter your benefit group name (do not include a date as these will remain the same in future plan years) under the “BENEFIT PACKAGE TITLE”.
Plan Year Creation – Step 4:
On the same page, under Benefit Package Title, you must select a coverage effective date rule for new hires from the “WHEN SHOULD NEWLY HIRED EMPLOYEES TO START THEIR COVERAGE?” drop-down.
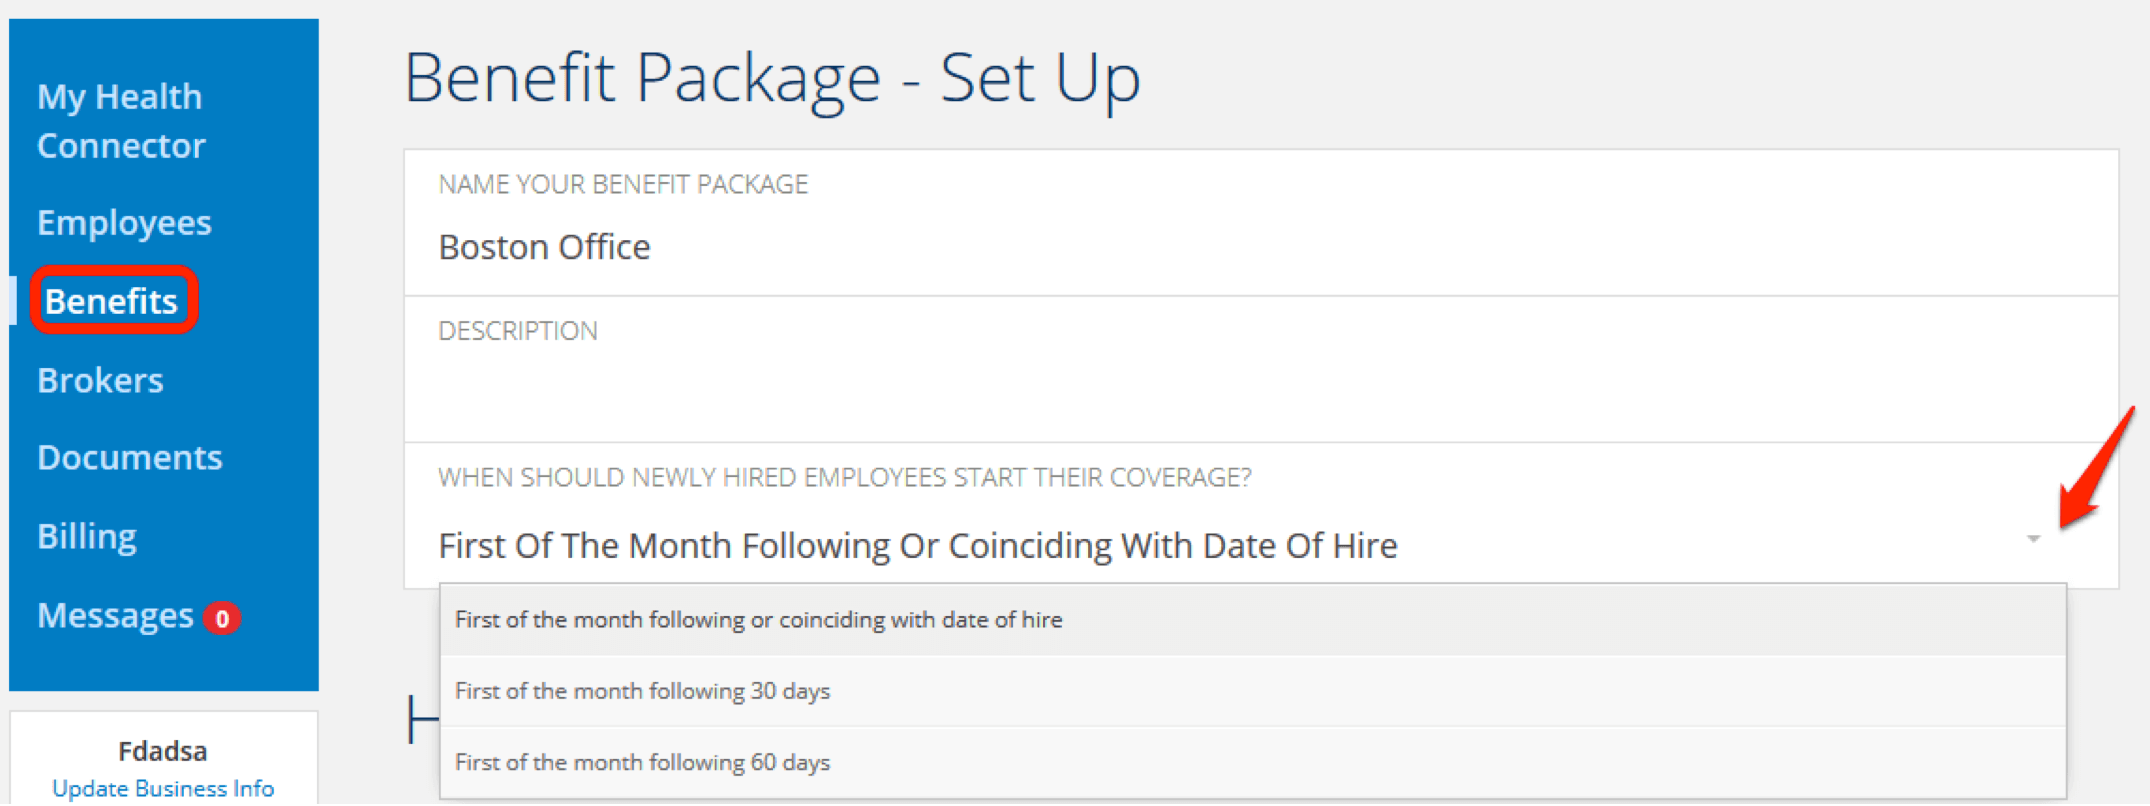
NOTE: You have three options when offering coverage to new hires through the plan year:
- 1st day of the month following or coinciding with date of hire,
- 1st day of the month following 30 days after the date of hire, or
- 1st day of the month following 60 days after the date of hire.
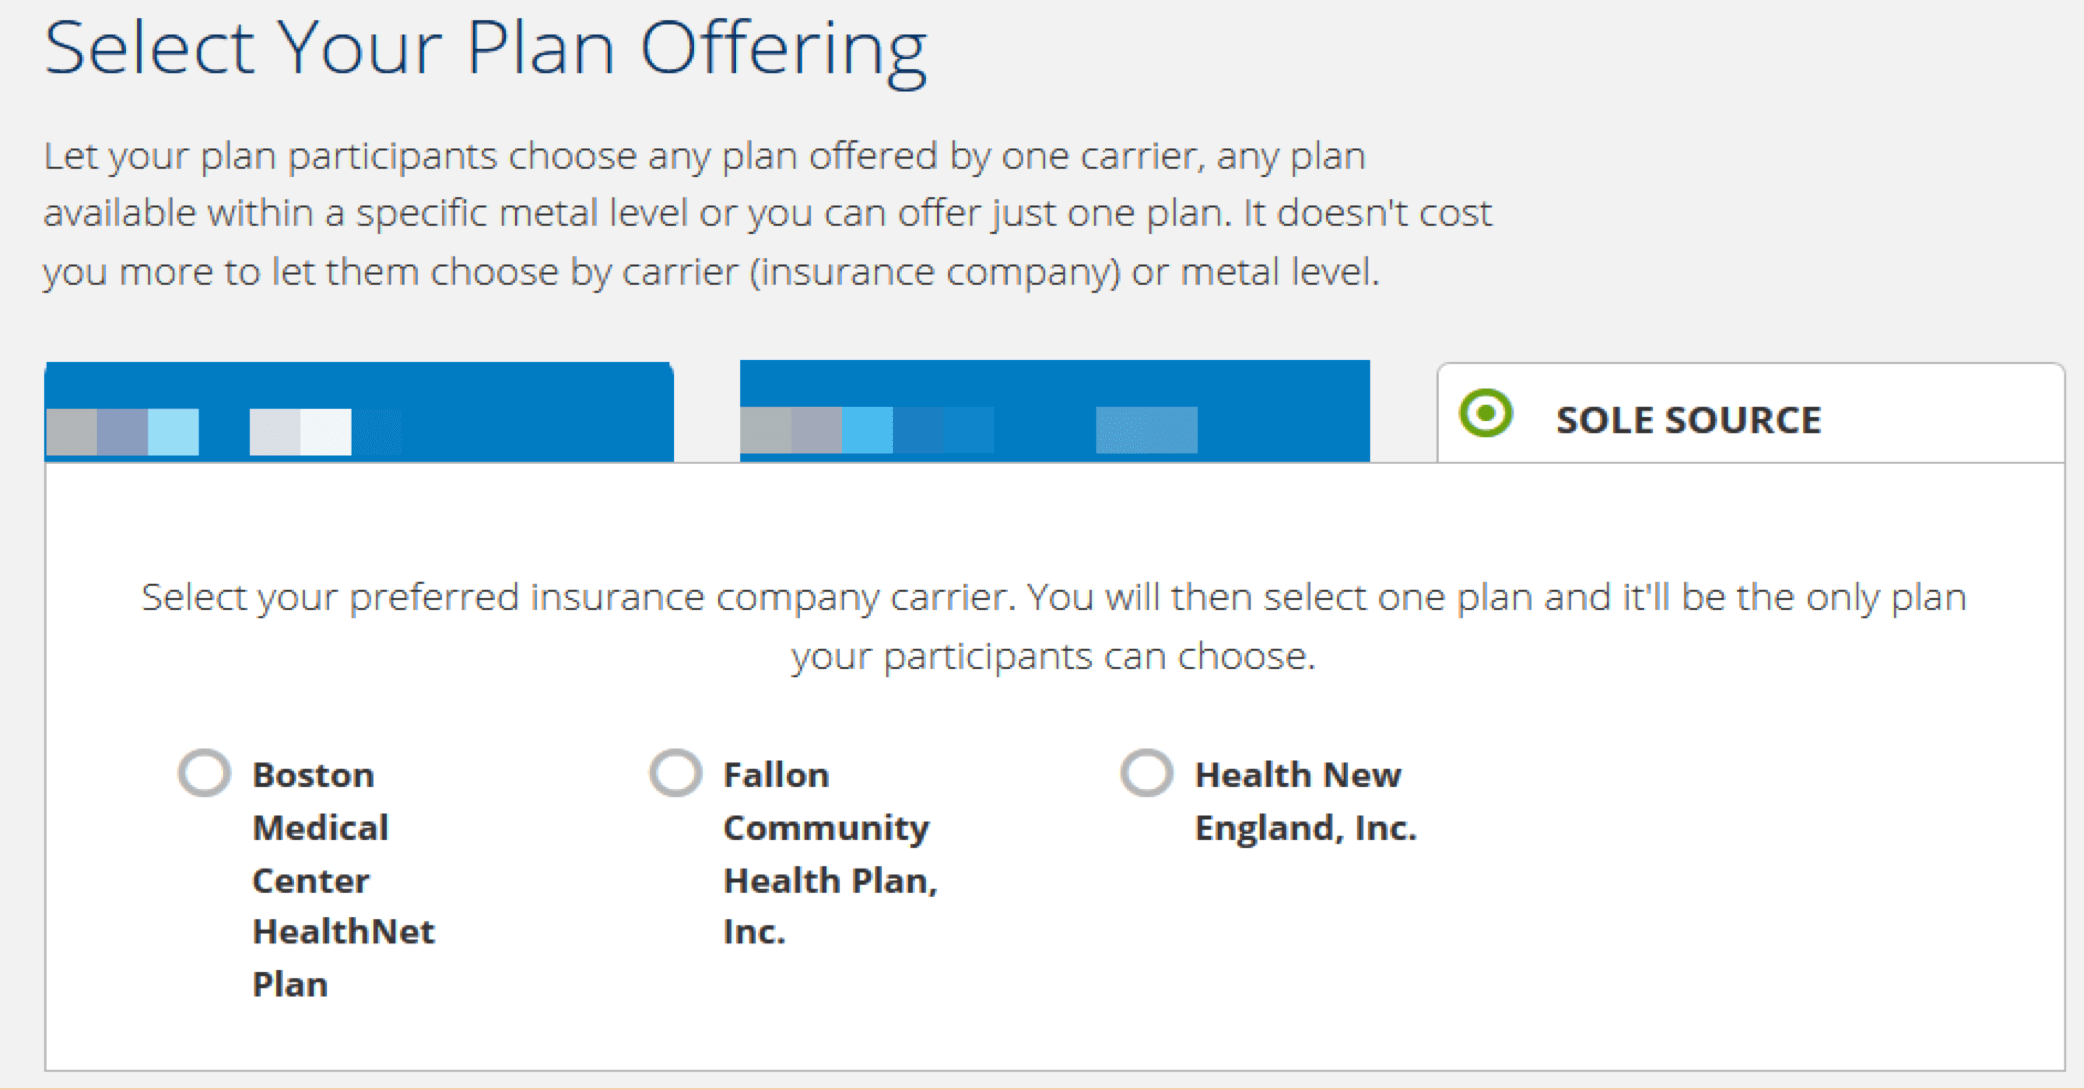
Select Which Plans to Offer
You will now select which plans to offer to your employees. You have one option:
- Single Plan (Sole Source)—Selecting a single plan only requires your plan participants to choose that plan and does not offer any further options.
Plan Year Creation – Step 5:
On the same page, select single plan offering. Then, select your preferred insurance company carrier.
Plan Year Creation – Step 6:
On the same page, select your reference plan by clicking the button to the left of the plan you choose.
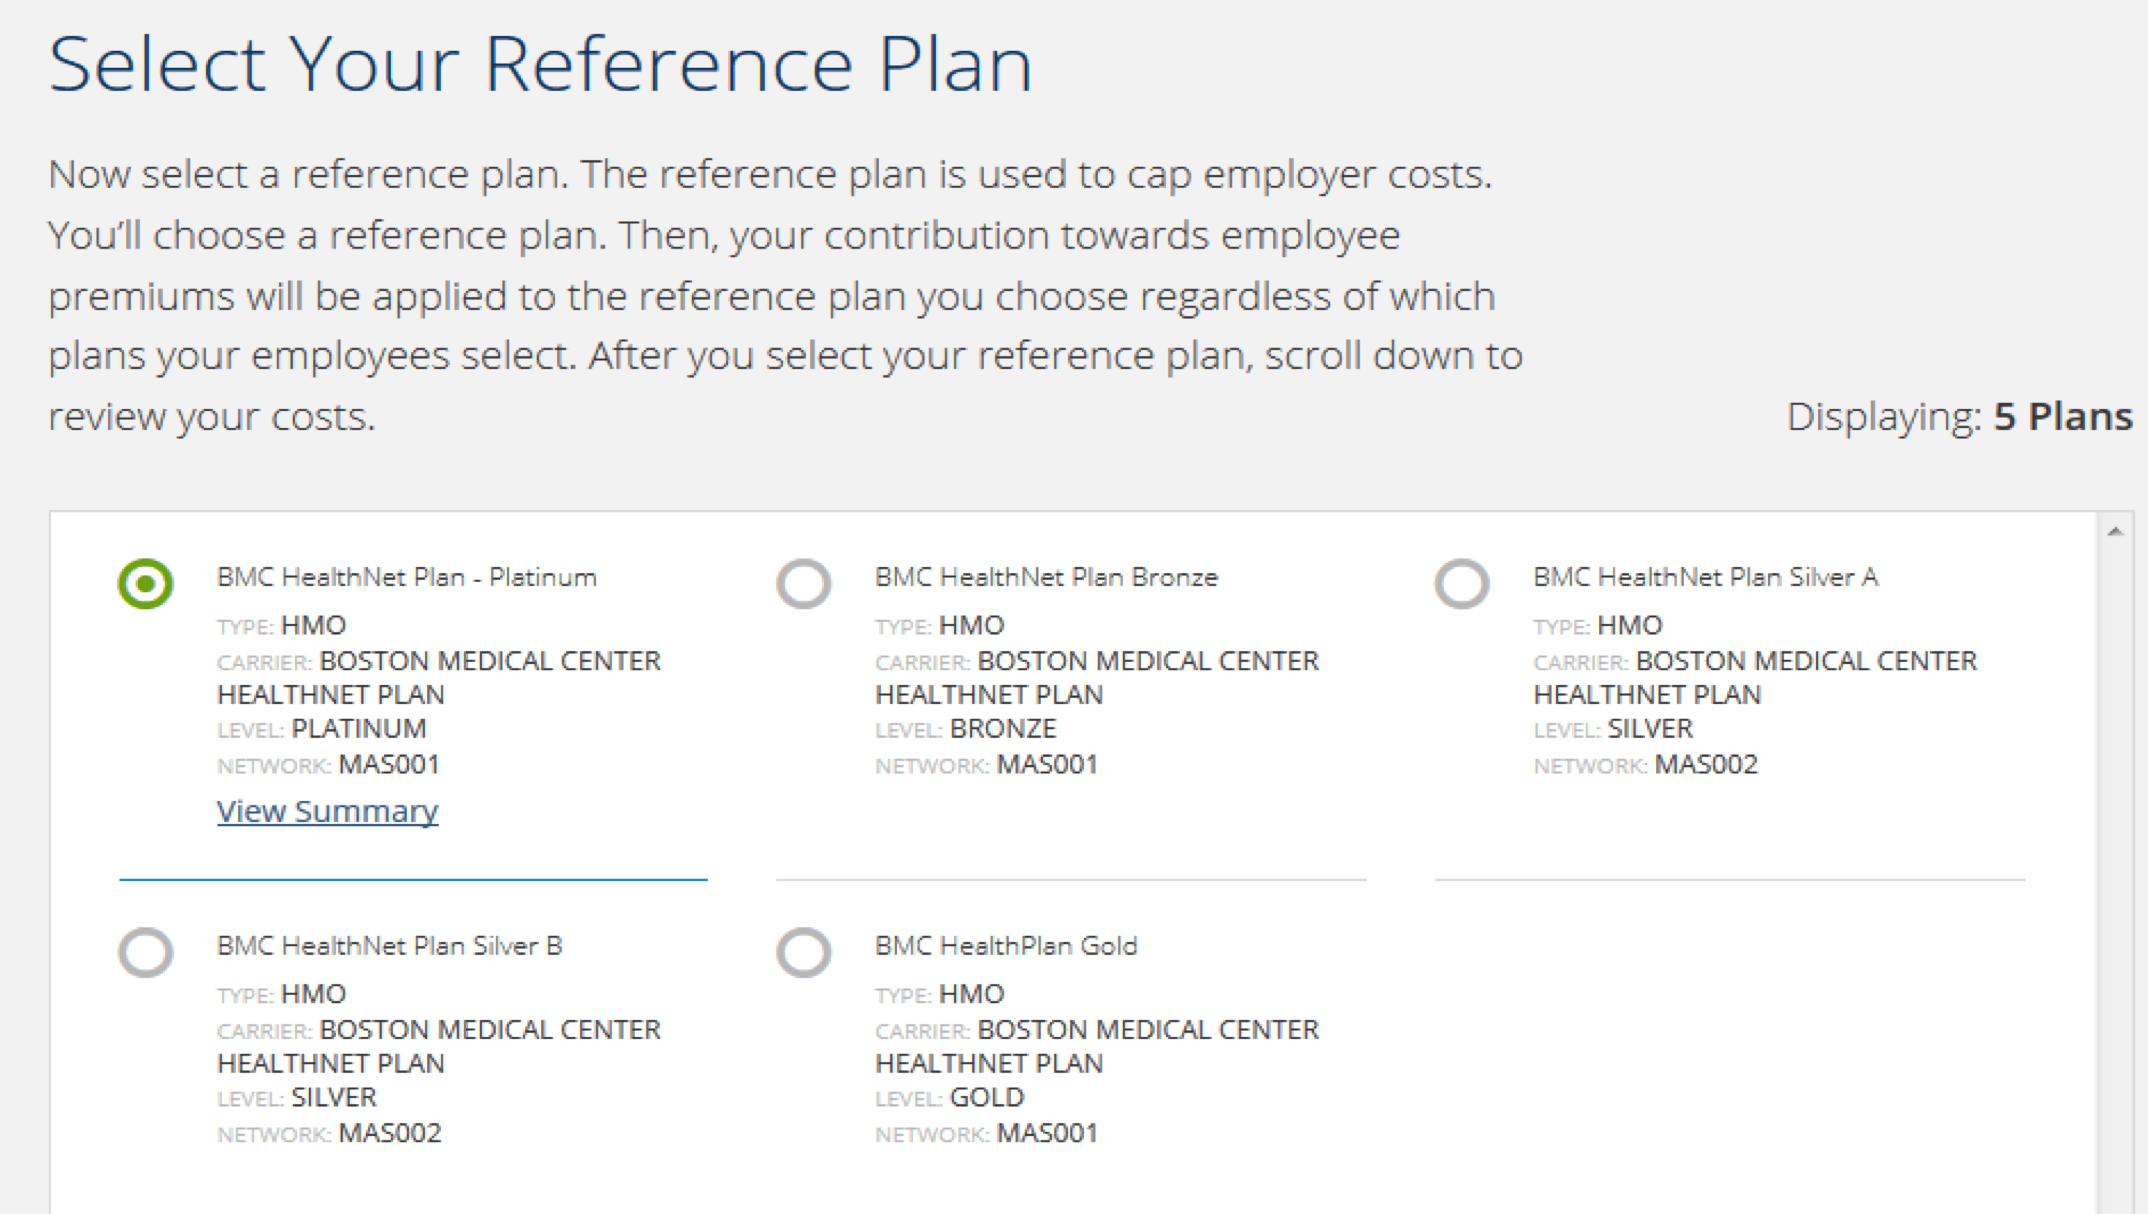
NOTE: The reference plan is a tool that allows you to offer your employees a choice of plans while also allowing you to fix your costs to a specific plan so that costs are predictable and fit within your budget.
Select Which Family Members are Eligible for Coverage
Plan Year Creation – Step 7:
Set your employee and family contributions.
NOTE: You must contribute at least 50% towards employee’s premiums and 33% for family premiums.

NOTE: Annually, employers have a special opportunity to enroll without having to contribute at least 50% of employee’s premiums and 33% to family premiums. This is only available for employers enrolling for a 1/1 plan year start date.
Plan Year Creation – Step 8:
Once you see your reference plan preview, click “CREATE PLAN YEAR”.

NOTE: If you would like to add dental coverage click “Add Dental Plans” otherwise, click “CREATE PLAN YEAR”.
NOTE: Your Estimated Monthly Cost will show as $0.00 if you do not have any employees added to your roster when you are creating your plan year. As you add employee you will see the cost reflected under the ‘Benefit’ tab.
Finalize Plan Year and Offer to Employees
To finalize your plan year and make plan shopping available to employees, you must ensure all employees on the roster are assigned to a benefit group.
Finalizing Plan Year – Step 1:
To assign employees to a benefit group, click the pencil on the right side of the employee’s information line. Once the employee’s information is pulled up click ‘Benefit Group Name’ and select a benefit group for the employee.

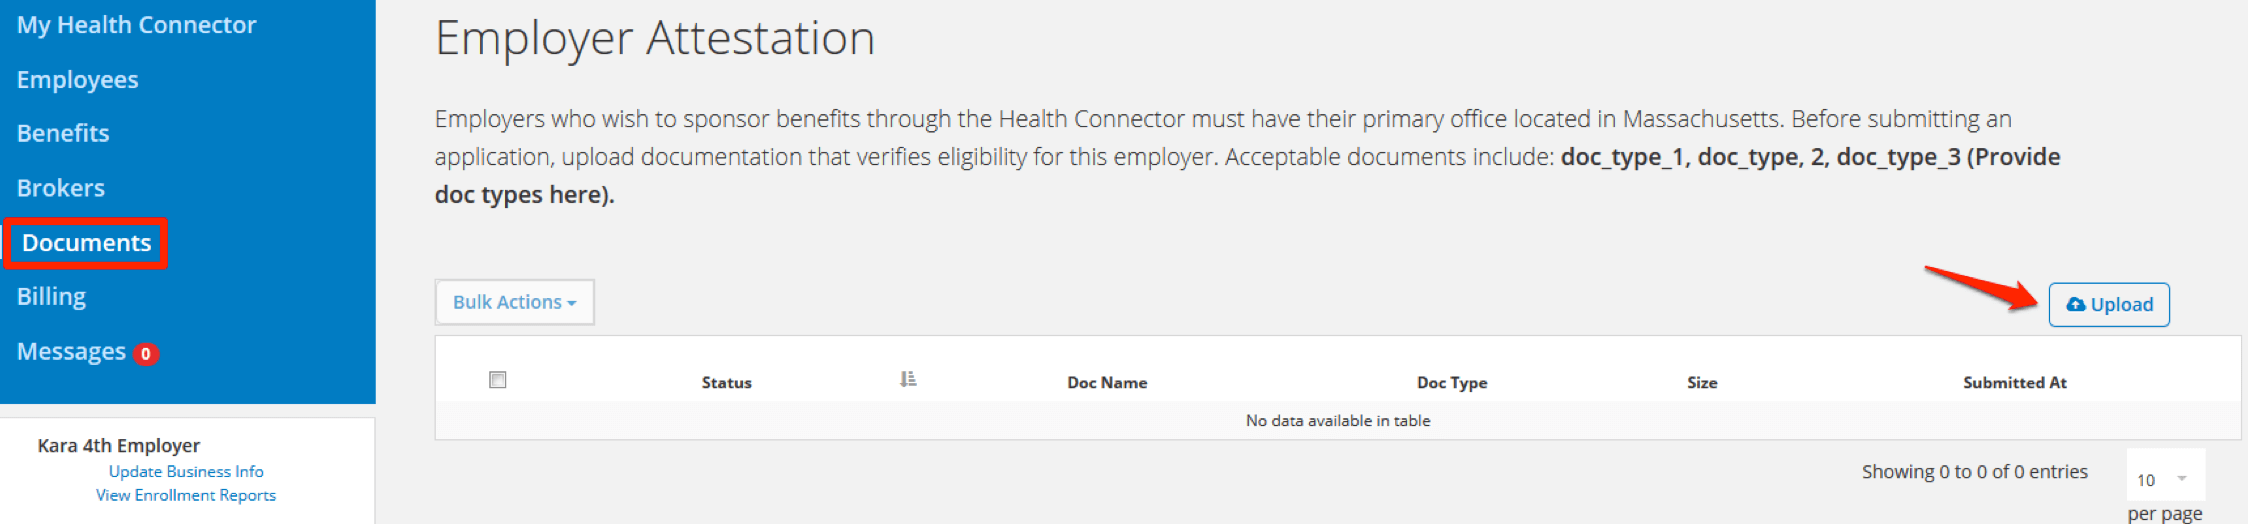
Finalizing Plan Year – Step 2:
Upload the required verification documents to the “Documents” tab. Click on the “Upload” button and attach the required files.
Finalizing Plan Year – Step 3:
Once all employees’ information is correct and they are assigned to a benefit group, click on the “Benefits” tab on the left side of the screen. You may click “Edit Plan Year” to make changes or “Publish Plan Year” to finalize your plan offering for the year.
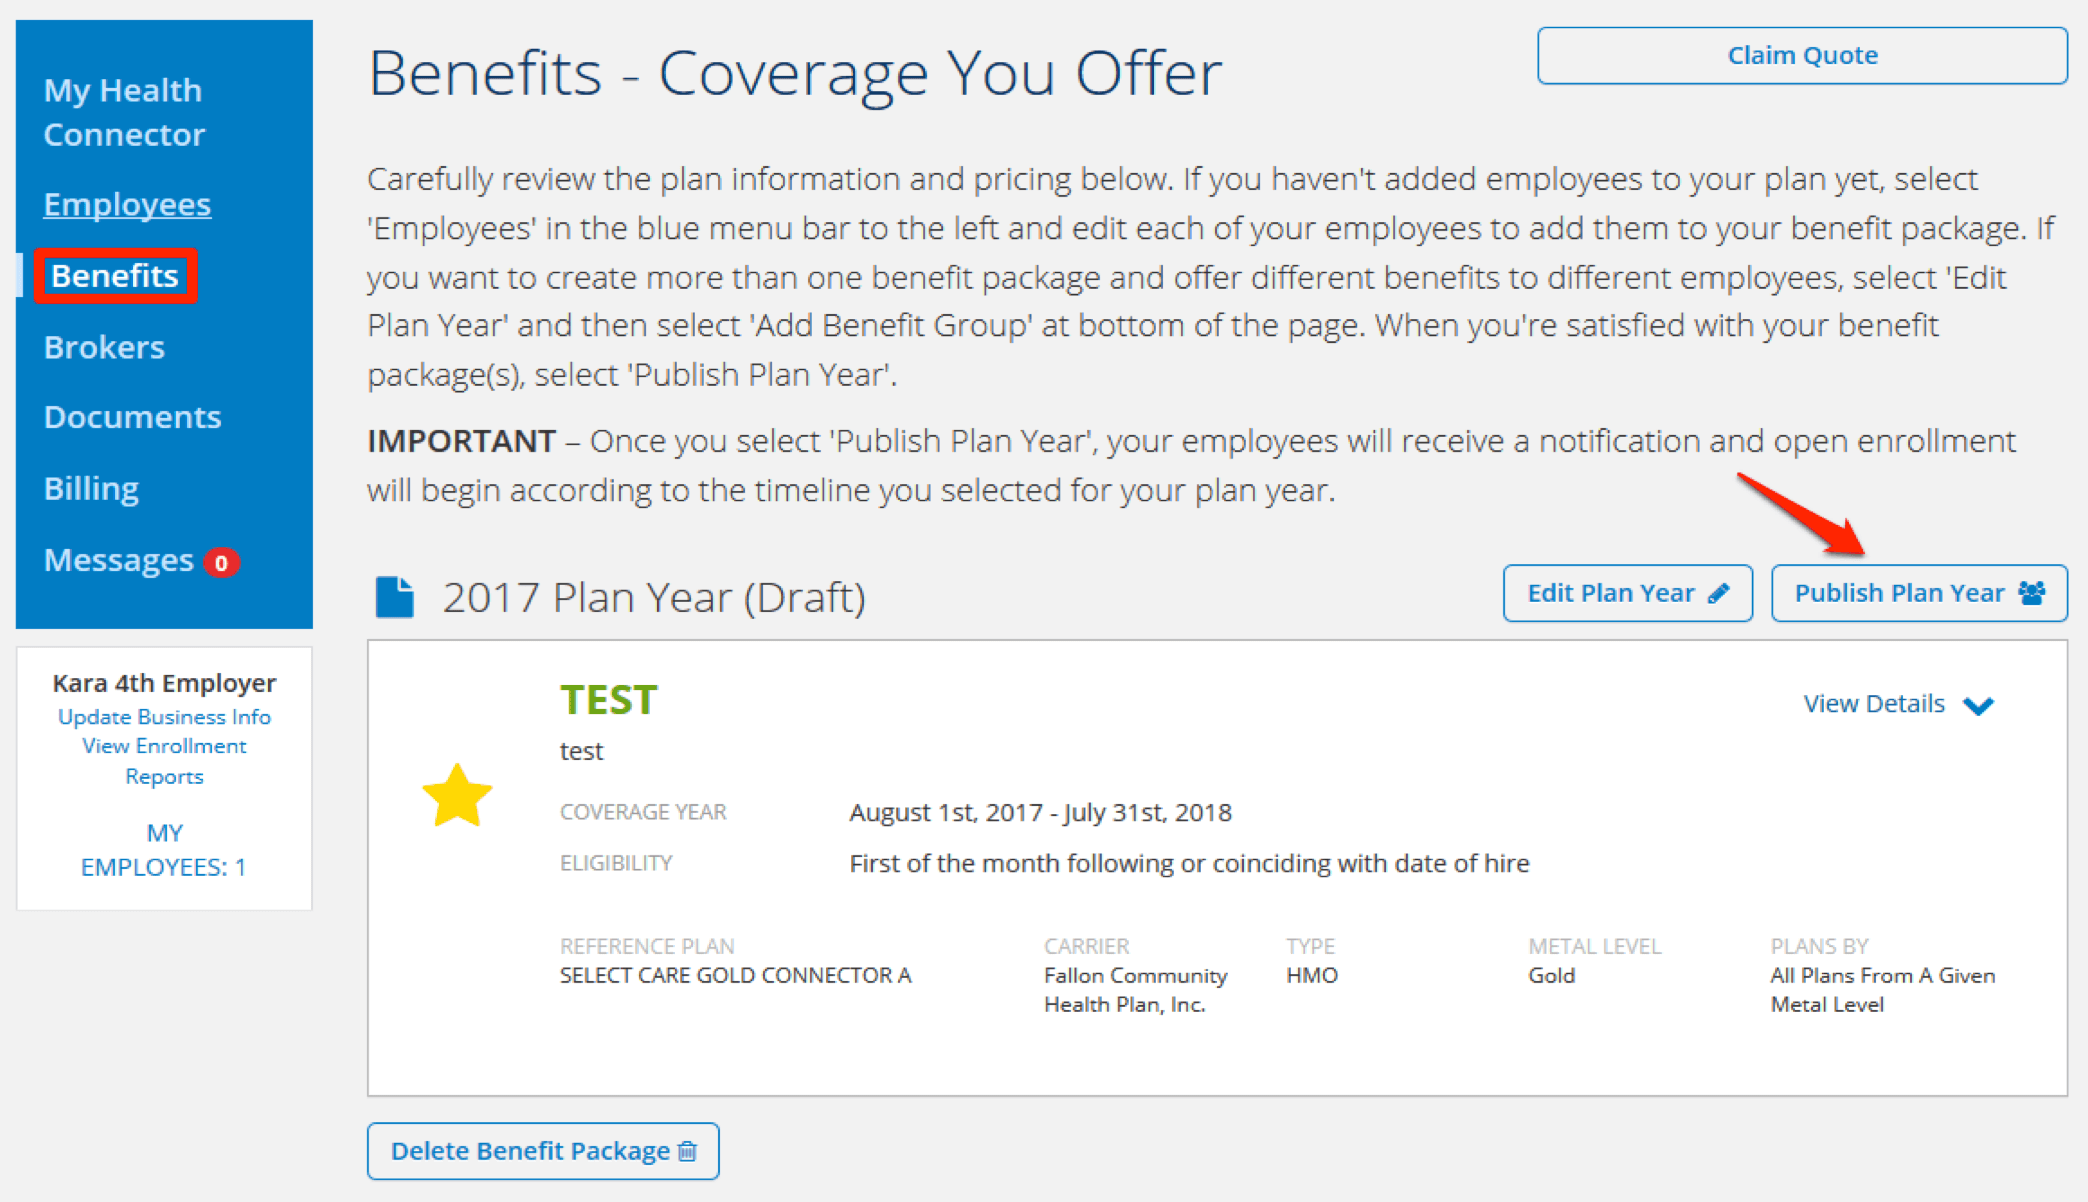
NOTE: Once you publish your plan year a yellow star will appear next to the plan year with a status.
What’s next? Manage Your Open Enrollment
Once you publish your plan year, your employees will receive notices informing them when their open enrollment period begins.
Your employer account home page will now have new tools available to you that allow you to track your employee enrollment status and manage your plan year.
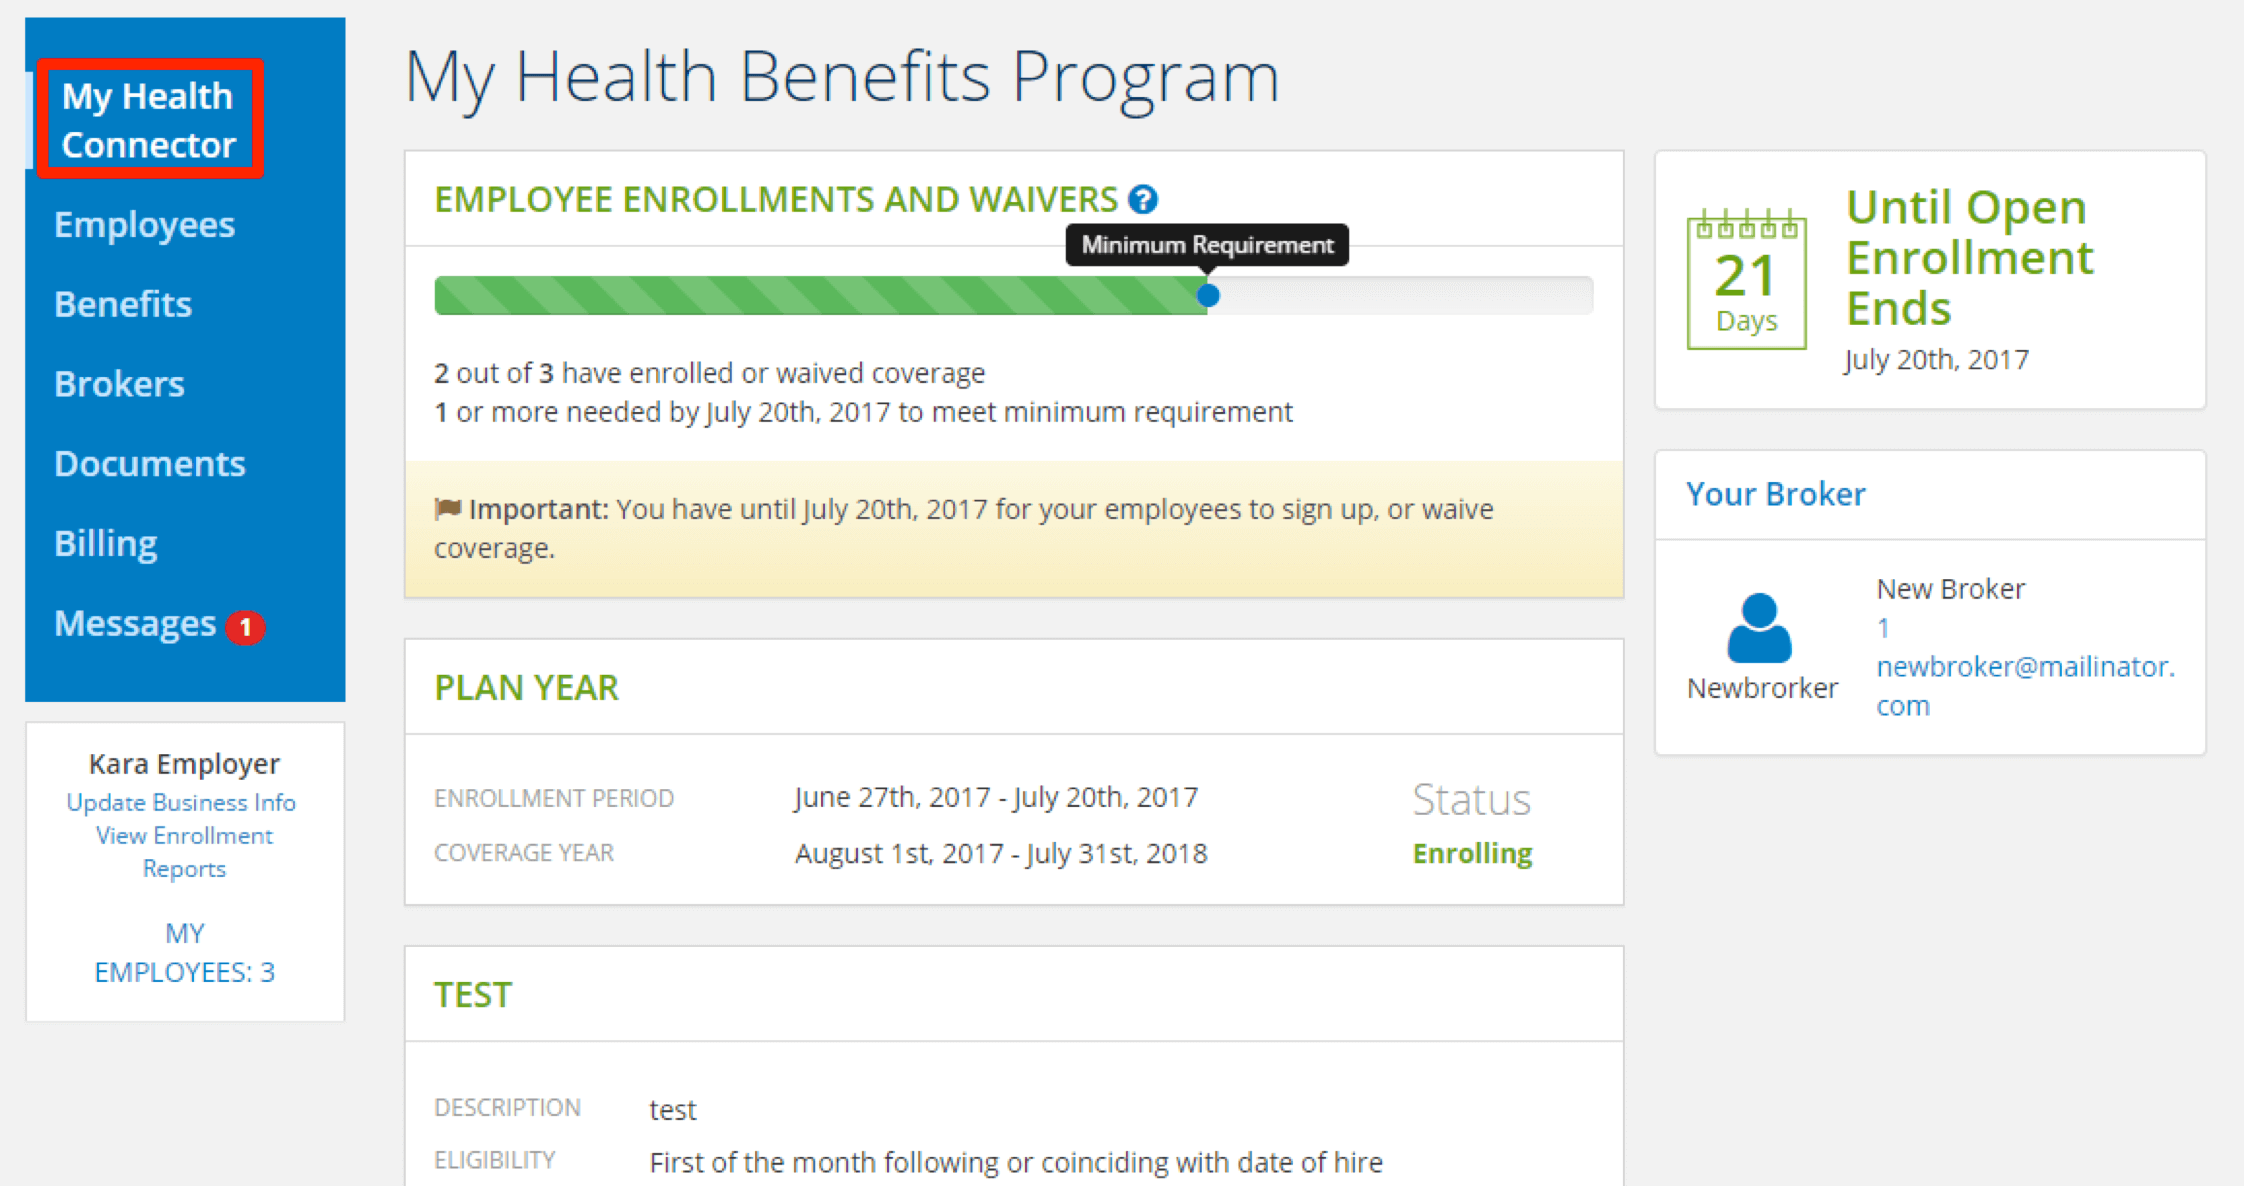
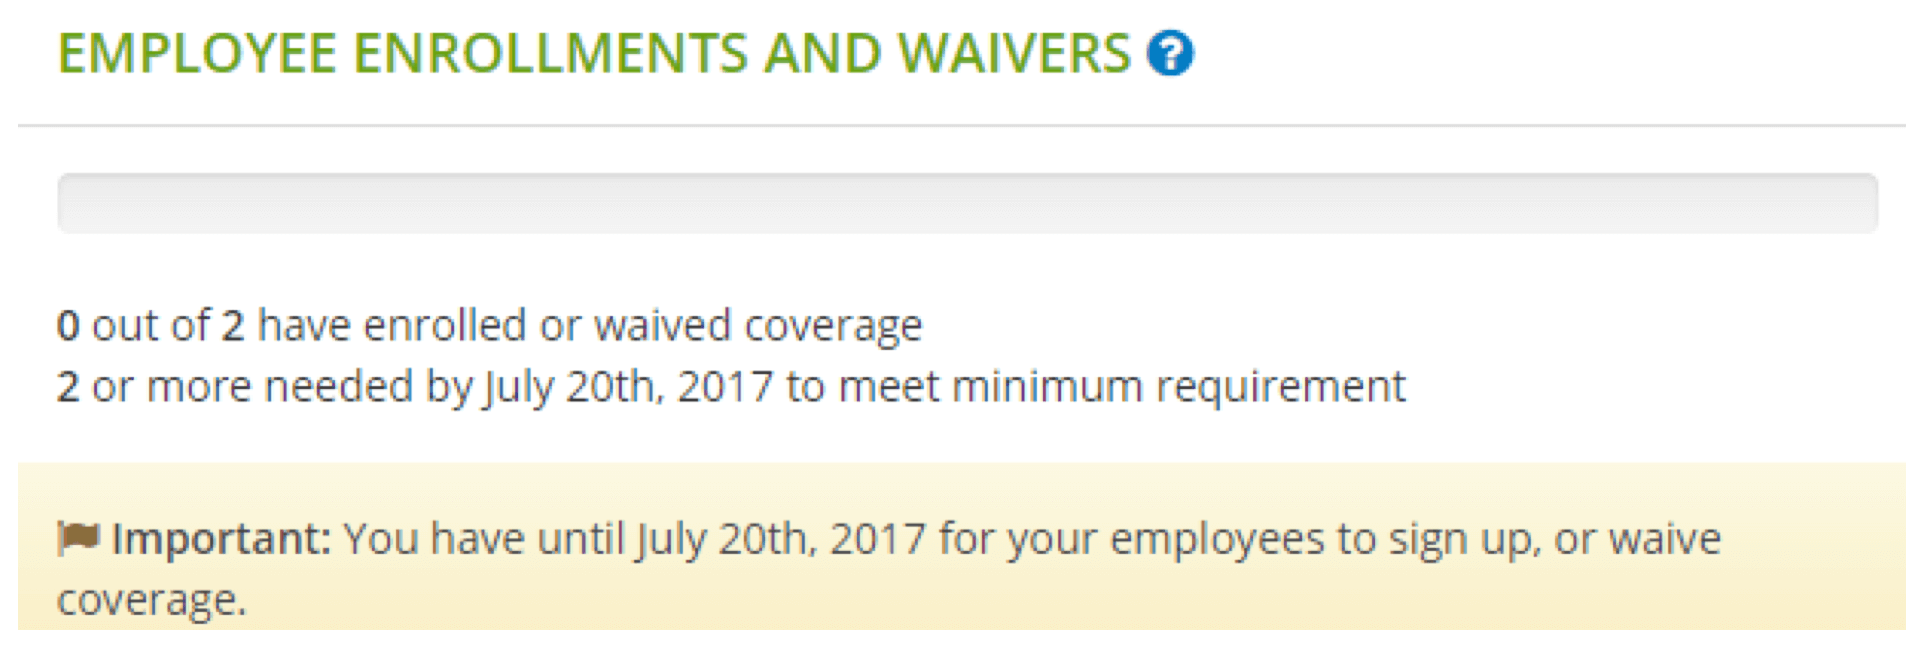
Monitor your employee enrollments using the Enrollments and Waivers counter at the top of your account home page. In addition to giving you an overview of how many employees have completed plan selections or waived coverage, this also notifies you of how many more employees need to enroll or waive coverage before your group meets the 2/3rds minimum participation requirement (not applicable for 1/1 plan year start dates).
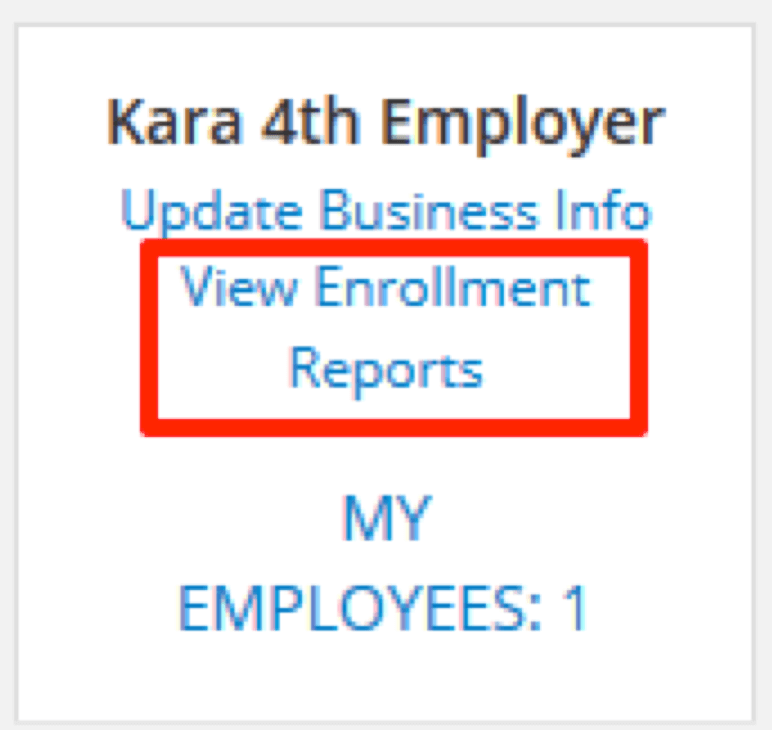
For more details on your employee enrollments, click the “View Enrollment Report” option on your account homepage.
Once your open enrollment period has ended, your invoice can be found under the “Billing” tab on your account homepage.